Lighting Setups with UsdGaffer
As well as creating lights and making edits, as explained in the previous section (see Using UsdGaffer), there are further tools inside the UsdGaffer node which help you configure your lighting setup efficiently.
Using Scopes and Xforms
You may wish to use Scopes and Xforms inside the UsdGaffer node. This can help organise your lights, adding them into sub groups in your scene hierarchy.
• Scopes and Xforms prims essentially both function as container prims. The key difference is that Scope prims do not allow transformations. If you wish to transform your lights, use the Rig (Xform) option.
You can add these in the same way as lights, via the + menu.
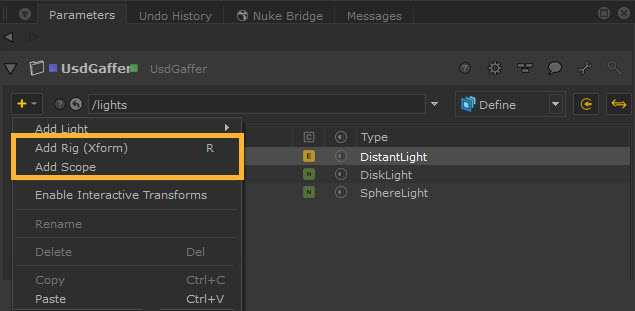
Tip: You can also quickly add a new rig via the R keyboard shortcut.
For example, the Add Rig (Xform) option results in a new Xform prim ‘rig’, which you can then add further lights within.
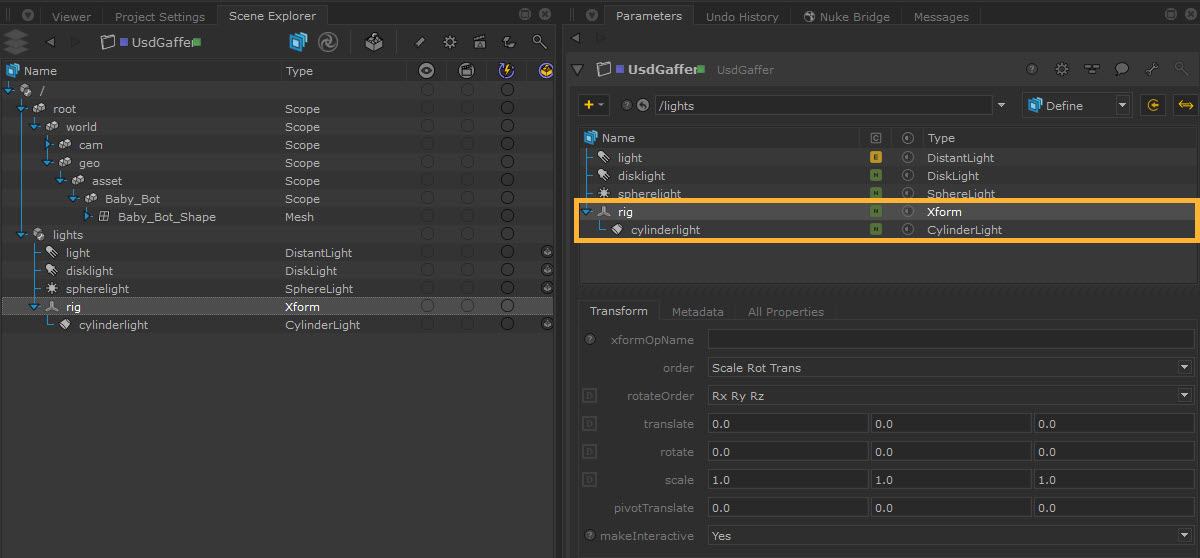
To add further lights within the Xform prim, select the ‘rig’ prim and use the + button again to add a light. The new light will be underneath the Xform in the hierarchy, both in the UsdGaffer treeview and in the Scene Explorer.
Tip: You can also create lights or take lights created elsewhere and drag them within the rig to group them within the hierarchy.
Using Light Filters
Light filters allow you to modify a light's behavior in order to achieve additional effects. Light filters are renderer-specific, but regardless of renderer, you can add them in the UsdGaffer node in the same way.
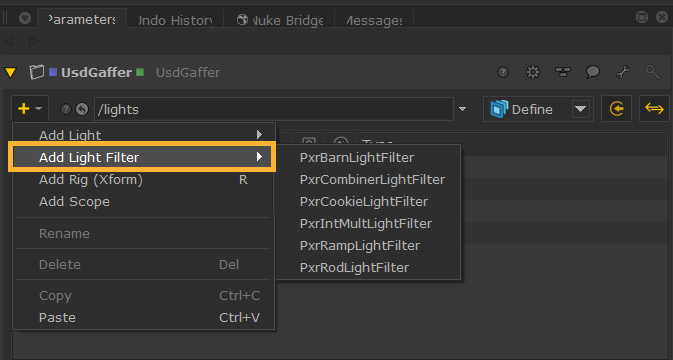
Note: The Add Light Filter option will only appear if you have relevant light filters available in the SdrRegistry.
To view available light filters, open the + menu, and select Add Light Filter. The list will dynamically populate based on the renderer you have.
You can add a light filter as the child of another light to have it affect that light. To create a light filter as a child of another light, select a light before using the + menu, and the generated light filter will be created as a child prim and automatically hooked up to the parent light.
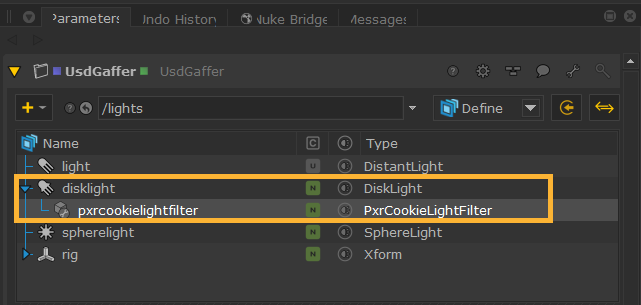
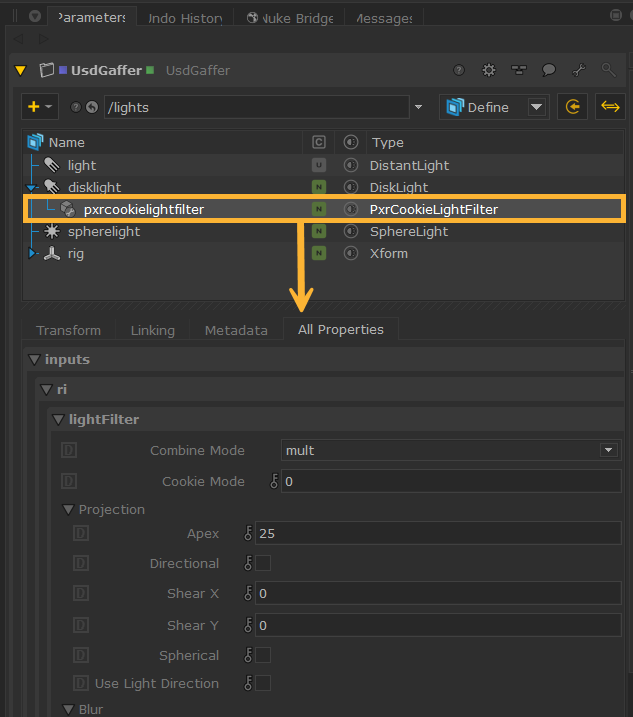
Once the light filter has been added to your treeview, you can then select the light filter to view and edit its parameters.
You can also work with upstream light filters node by allowing incoming prims in the UsdGaffer node. This works in the same way as incoming light prims. See Adding Incoming Prims.
As with light and shadow linking, light filters also support linking. Go to the light's or light filter's Linking tab. You can then drag paths into the filters property. Learn more about linking at Light Linking and Shadow Linking.
Note: You can move a light filter to affect a different light in the UsdGaffer treeview by dragging and dropping the light filter on top of another light. On the Linking tab, you can manually modify the light filters affecting the light, remove the current light filter, or add more light filters to the list, e.g. if the same light filter is being shared across many lights. The light filter prim parent light prim's light:filters relationship attribute will be updated to reflect the change.
Note: Light filters can also be converted from Katana to USD, and vice versa, via the KatanaToUsd and UsdToKatana nodes. Read more about this at Light Filter Conversion.
Changing Visibility
Similar to GafferThree’s “muting”, you can change the visibility on the respective prim by either using the toggle in the treeview or changing the visibility property in the Parameters > All Properties > visibility.
The visibility column toggle in the treeview can be especially useful for turning lights on and off quickly to be able to view how each of them affect the scene.
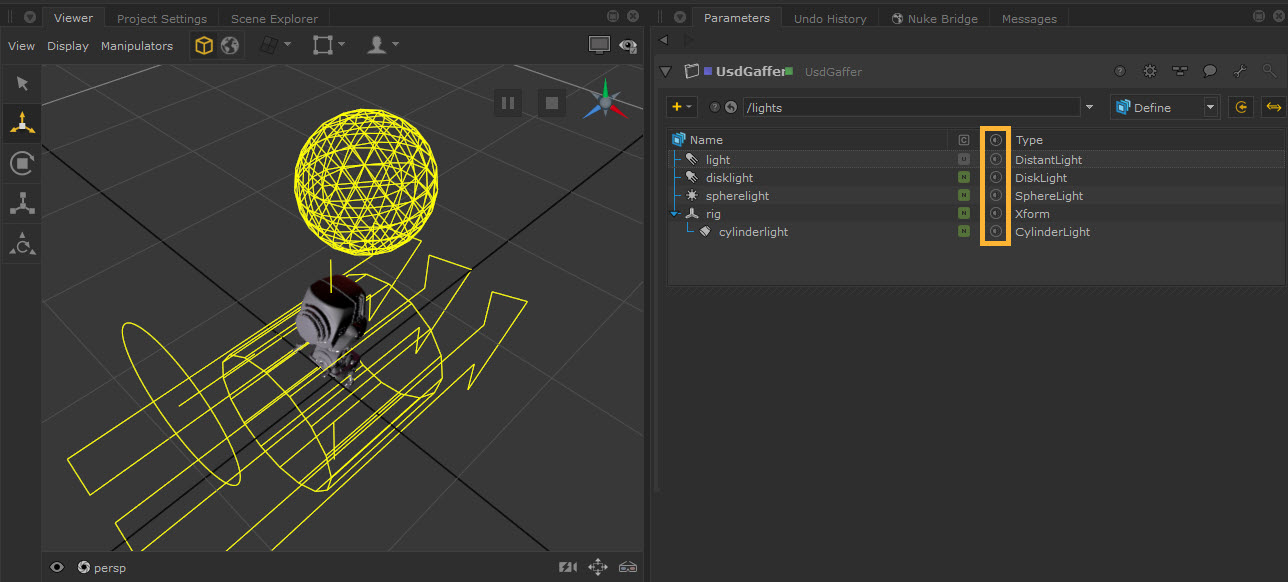
Select the icon in each light’s row in the visibility column to turn off or on the visibility of the light, or use the column heading icon to toggle all lights at once.
• This icon shows that the lights are visible (either inherited or local visible): ![]()
• This icon shows that the light is invisible (either inherited or local invisible): ![]()
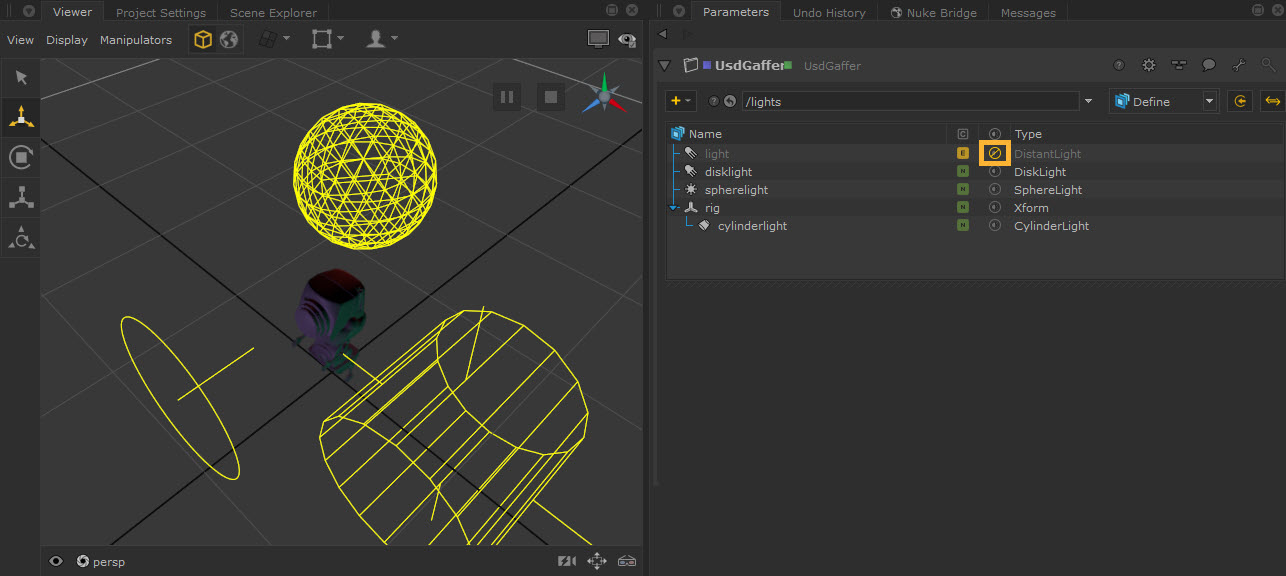
For example, turning the white DistantLight to invisible, reveals the purple color of the DiskLight underneath:
Toggling their visibility allows you to affect what you see in the Viewer. Changing the visibility of any rigs or scopes will also affect their children.
When you change the visibility of an incoming prim, it will only change locally.
There are four visibility states: inherited, local visible, local invisible and inherited invisible, but toggling it in the treeview will only swap between the following three: inherited, local invisible and local visible.
Tip: You can hover over the visibility icon to see further details about the state.
Debugging
If there are issues with your scene configuration, it may help to view how your stage is structured by:
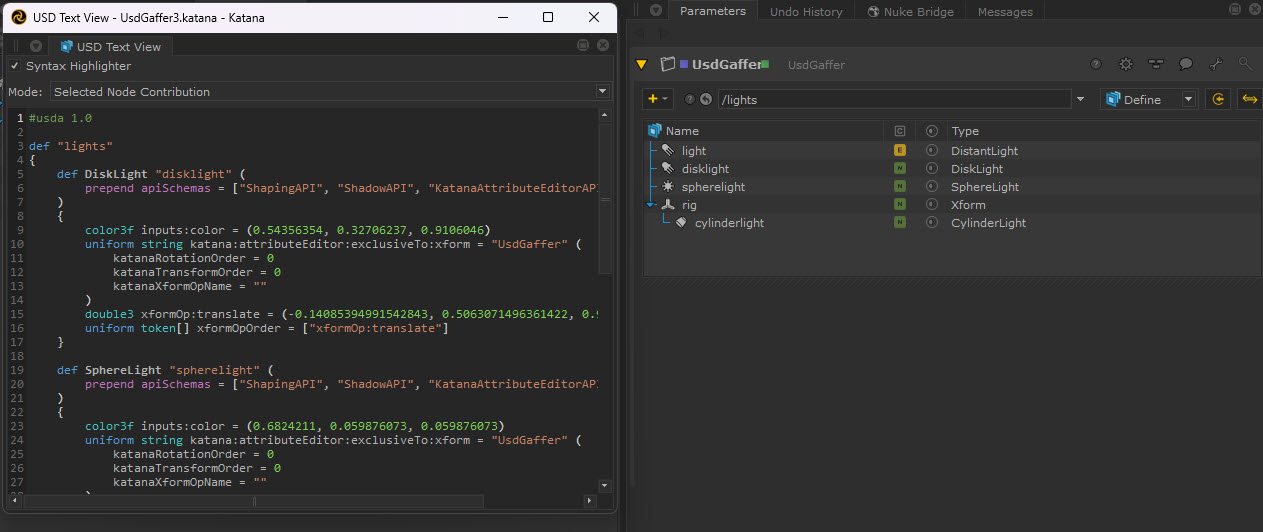
• Opening the UsdGaffer node in USD Text View to see the USD code text. This can be done via Tabs > USD Text View. See more about this at USD Text View.
• Opening the usdview window to explore different parts of the scene. See more about this at Launching Usdview in Katana.
For example, when opening USD Text View, you’ll find that all of the data is stored in one layer. Note that edited prims will come up as an “over” on the light, whilst newly created ones will be defined “def” within the document, and only the changes made within that node will be stored, keeping it lightweight and efficient.