Using UsdGaffer
You can use the UsdGaffer node to create multiple lights and store changes under one USD layer. You can view all your upstream or new lights in the treeview, edit parameters, and make overrides all in one place.
There is no limit to how many lights you can add to one UsdGaffer node. You’ll find that even with adding many types of light, Scopes and Xform prims, with overrides and edits, all the data is stored on one USD layer, helping optimise scene management and performance.
Note: This is possible due to Katana’s UsdSuperLayer, from which the UsdGaffer is derived. To learn more about how this works, see UsdSuperLayer Framework.
Tip: This framework also means that the UsdGaffer node is very customizable. See more about this at Customizing UsdGaffer.
Adding Lights
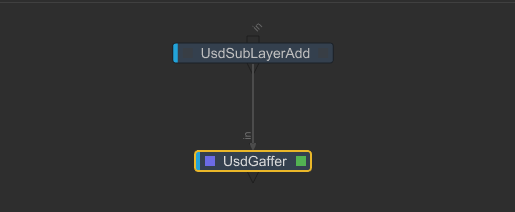
Create a UsdGaffer node and place it downstream of your geometry. Set the edit flag (indicated by the green square) on the UsdGaffer node using the ‘E’ key or double clicking the node.
Open the UsdGaffer node Parameters panel. Select the + button to open the menu and select which type of light to add.
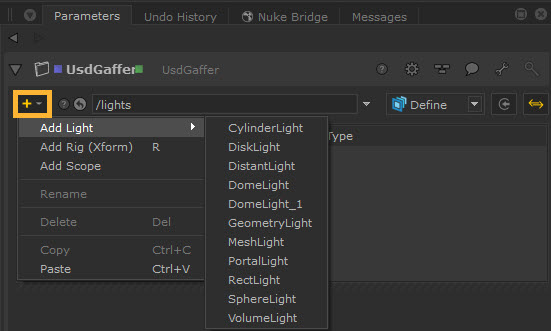
Tip: This menu can also be accessed by right clicking in the panel.
Note: The prims and lights listed in the dropdown menu will be dynamically populated, meaning each renderer that has lights and/or light filters listed in USD will appear in this dropdown. These lights are discovered by searching the SdrRegistry for anything with “light” as its context.
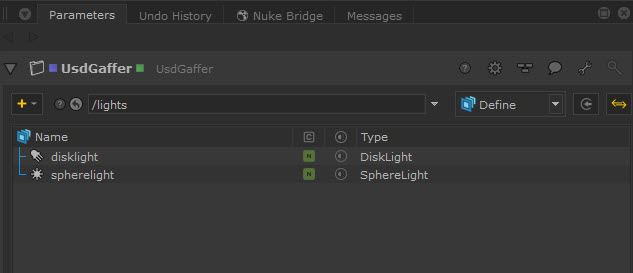
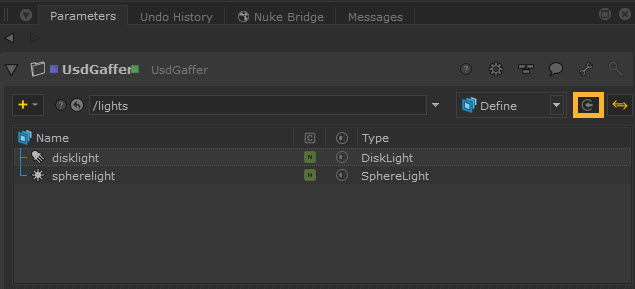
Once selected, the light will be added to the layer. In this example, two new lights have been added to this UsdGaffer node:
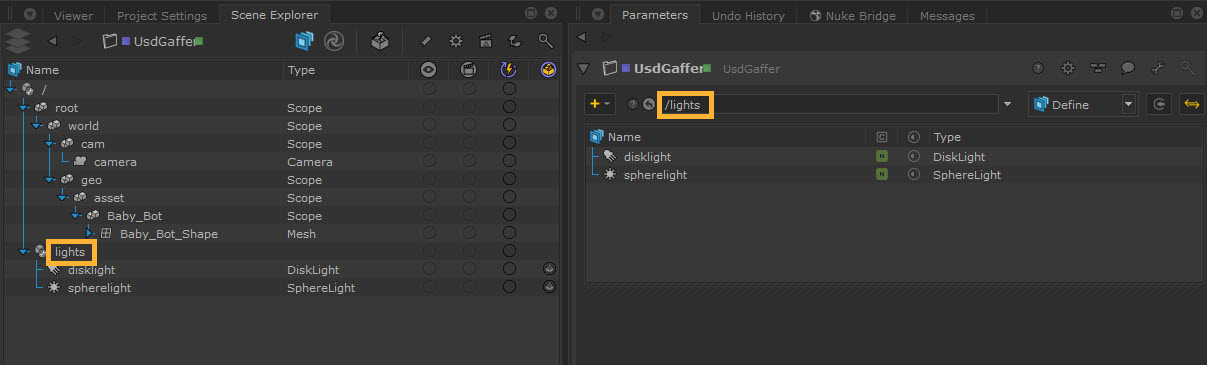
The Prim Path toolbar shows you the path under which your lights are created in the Scene Explorer. This defaults to /lights but can be edited if you wish to change the path. To edit it you can just type a new path in the toolbar.
You can also rename the light prims themselves in the treeview by right clicking on the light and selecting Rename. Similarly, you can delete them by selecting Delete.
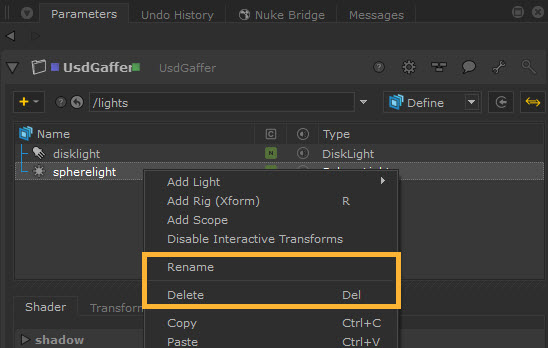
Tip: You can also rename lights by double clicking on the name or pressing the F2 shortcut.
Note that lights can be renamed only if they’ve been created locally to that node. USD doesn’t have a concept of deleting between layers, so if an upstream light gets picked up, the Rename or Delete option will not be available. You can either go upstream to delete the light where it was created or disable/set the visibility to off in order to remove its contributions.
Note: There are several ways to copy and paste lights using the UsdGaffer node, such as Copy Composed and Duplicate - see Copying and Pasting Prims.
Editing Light Parameters
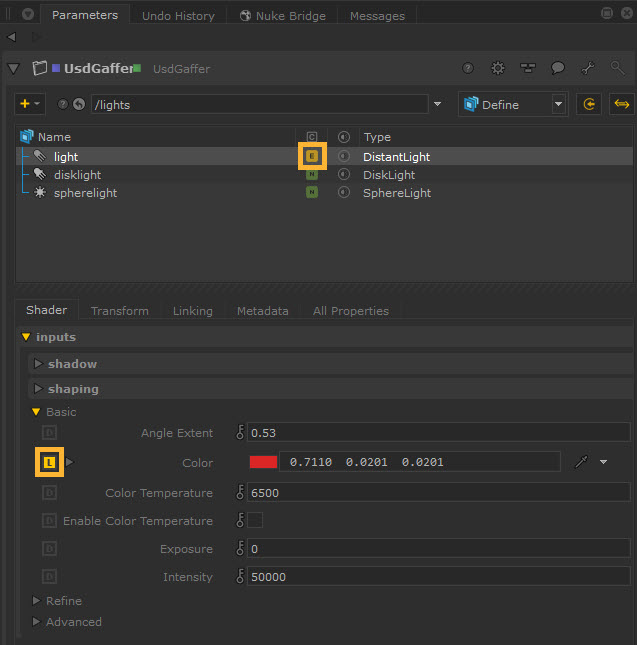
When you select each light in the UsdGaffer treeview, you’ll be able to view and edit its parameters in the panel beneath.
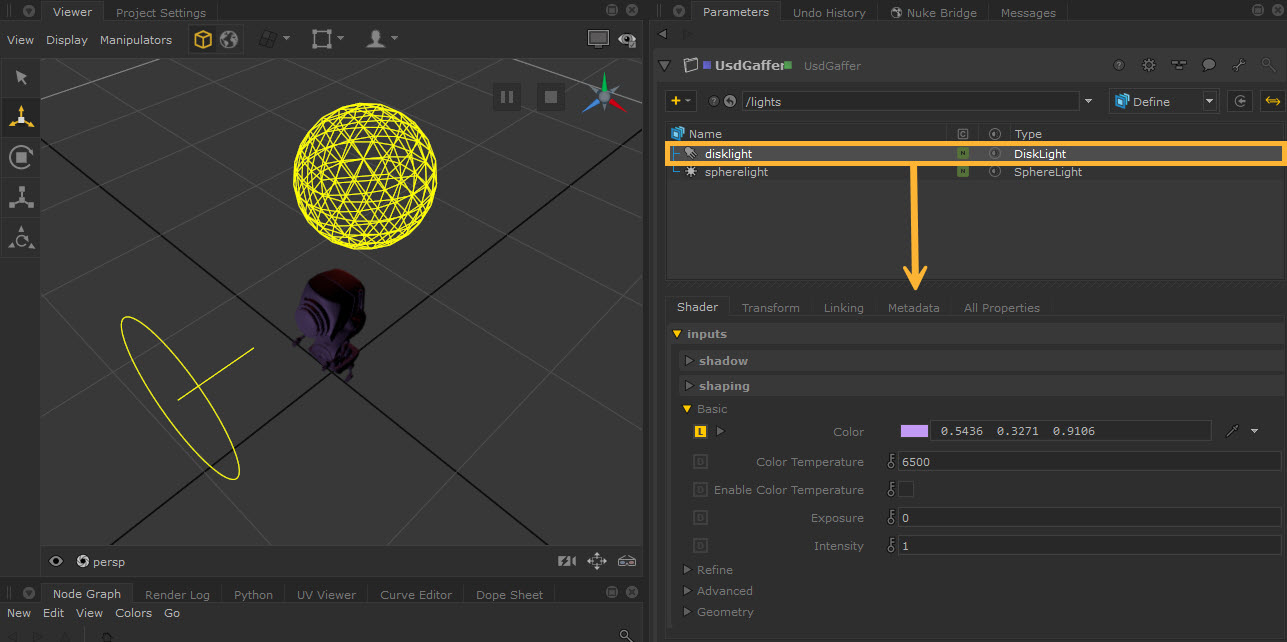
Any edits you make will then show the yellow L override icon.
Tip: Make sure to uncheck Default Lighting in the Viewer > Display options to see your lights in the Viewer.
You can choose to view and edit different Parameters via the Tab menu:
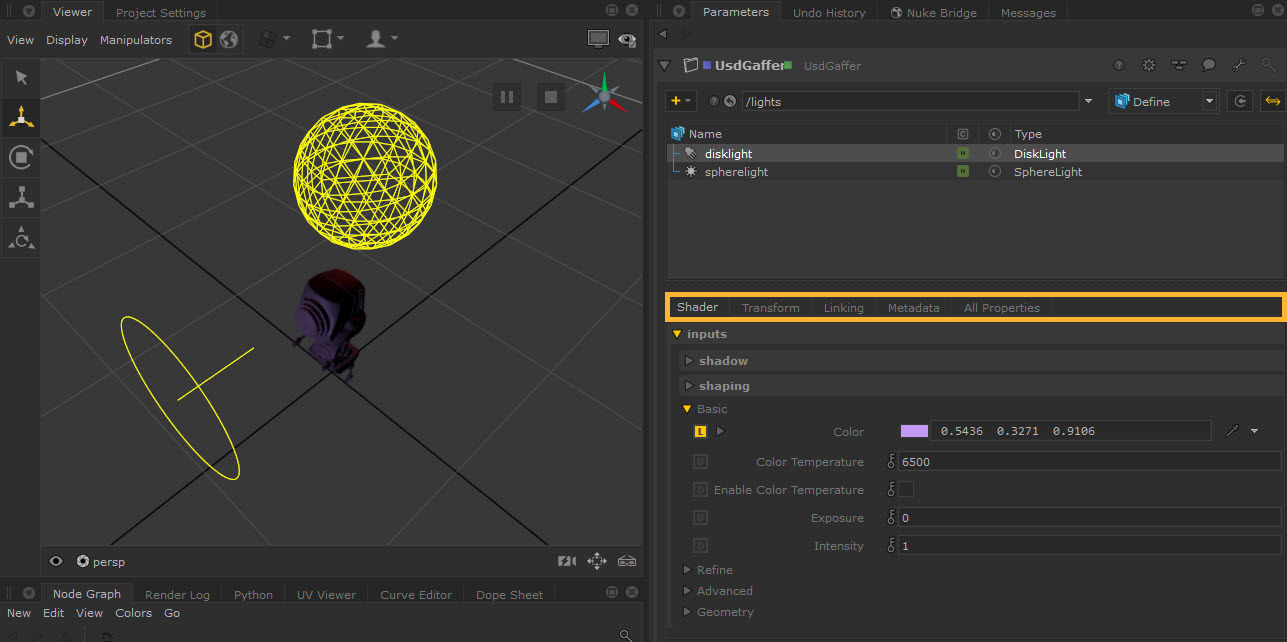
• Shader - properties used for altering the effect of the light such as Color and Intensity.
• Transform - properties used for transforming the light. All lights added via UsdGaffer can be transformed from the Parameters panel and interactively in the Viewer. See Transforming Lights.
• Linking - Light linking allows you to light a set of objects while others aren’t or turn off the lights on a set of objects while the others are lit. You can link lights and shadows via the lightLink and shadowLink parameters. See Light Linking and Shadow Linking to learn more.
• Metadata - view additional metadata on the light prim.
• All properties - here you will find all of the rest of properties. These are mostly related to USD such as purpose and visibility.
See UsdGaffer in the Reference Guide to see a breakdown of all of the node properties.
Note: Each tab represents a ParametersHandlerPlugin under the hood where its priority in ranking and its label can be adjusted.
States and Edits
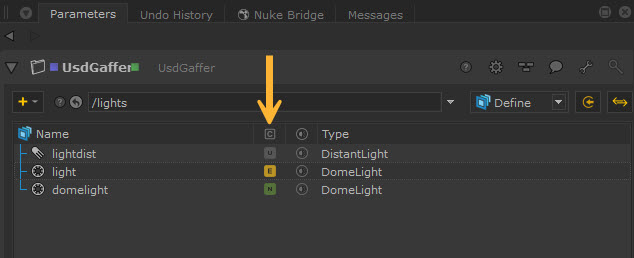
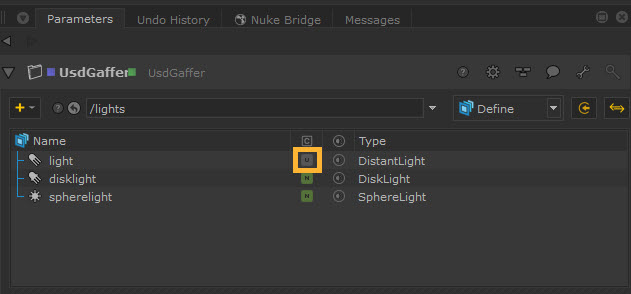
In the treeview you can easily differentiate between local, upstream, and downstream changes. The colored labels in the  column give you an indication of this:
• 'U' for incoming prim that has no edits (Unchanged state) - see more about incoming prims below.
• 'E' overs as an edit on an incoming prim (Edited state) - see more about incoming prims below.
• 'N' for locally created prims (New state).
Note: The UsdGaffer node follows the same visual designs as seen in the Scene Explorer tab, for displaying over and abstract prims, as well as visibility and active states. See more at Using the Scene Explorer.
Adding Incoming Prims
The showIncomingscene button gives you the option to show other lights in your scene if they have been imported or created upstream using other nodes.
When enabled, these lights will show in your treeview with a grey Unchanged state. You can then edit them from here. Be aware that any changes will only be reflected if they are made inside the UsdGaffer rather than the original source.
If you edit any incoming prims via UsdGaffer, they will then show with the yellow Edited state. This is essentially saying that the incoming prim has been overridden.
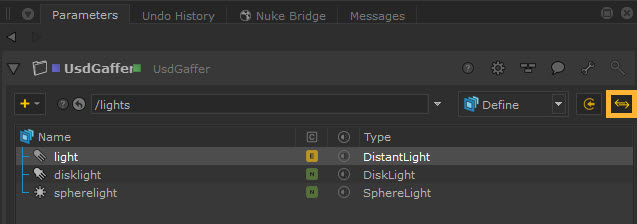
Selections
To control whether UsdGaffer affects your Scene Explorer selections, you can use the SyncSelection button.
The following three options are available:
• off: Selections are independent from the Scene Explorer.
• out: Selections in the node are synced to the Scene Explorer, but selection in the Scene Explorer is not synced to the node.
• in/out: Selections are synchronized both ways in the node and the Scene Explorer.
The SyncSelection button is set to in/out by default. This can also be changed in Preferences > nodes > usdGaffer > syncSelection.
Setting Up Scenes
With UsdGaffer node, you can also set up Scopes and Xforms, change light visibility, and add light filters.
See more about these at Lighting Setups with UsdGaffer.