Using UsdSuperLayer
The UsdSuperLayer node allows a new framework to create and edit any prim in Katana. Prims are created on a single USD layer, helping scalability and efficiency.
Note: If you want to learn more about the philosophy behind the UsdSuperLayer, see UsdSuperLayer Framework.
Tip: If you have a range of different prim types, UsdSuperLayer is a versatile and useful tool. However, if you are focusing on lighting, it would be recommended to use the equivalent node designed specifically for lighting set ups, see Using UsdGaffer.
Tip: The UsdSuperLayer framework means that the UsdSuperLayer node is very customizable. See more about this at Customizing UsdSuperLayer.
To populate a layer you may wish to create new prims, add prims from elsewhere in your scene (incoming prims), or a mixture of both.
Creating New Prims
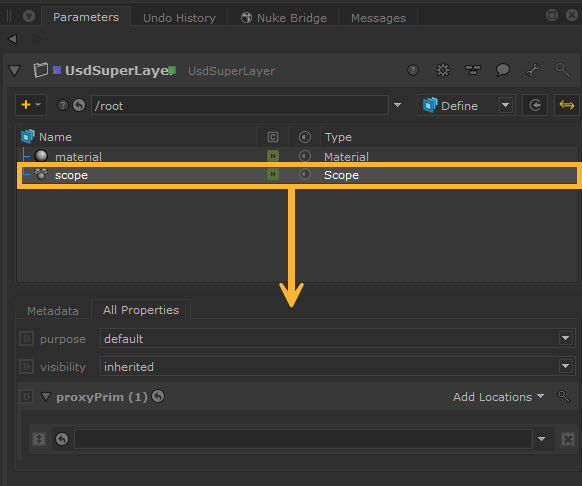
| 1. | Create a UsdSuperLayer node. Set the edit flag (indicated by the green square) on the UsdSuperLayer node using the ‘E’ key or double clicking the node. |
| 2. | Open the UsdSuperLayer node Parameters panel. Select the + button to open the menu and select which type of prim to add. You can select from Lights, Materials, Rigs (Xform) and Scopes. You'll also be able to add Light Filters if you have set up a renderer. |
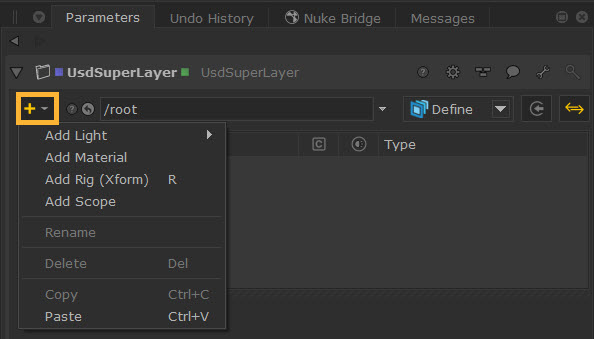
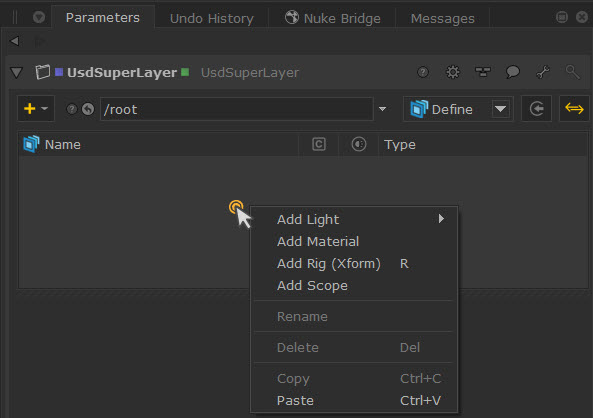
Note: This menu can also be accessed by right clicking in the panel.
Note: The prims listed in the dropdown menu will be dynamically populated from the SdrRegistry, meaning each renderer that has prims in USD will appear in this dropdown.
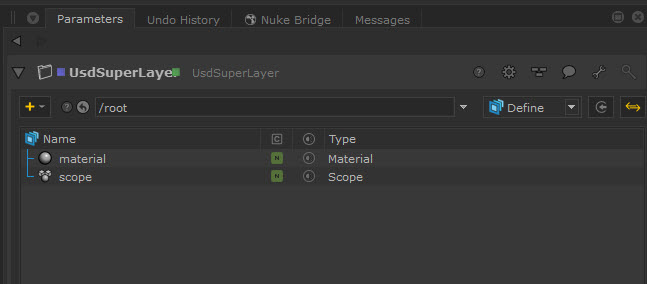
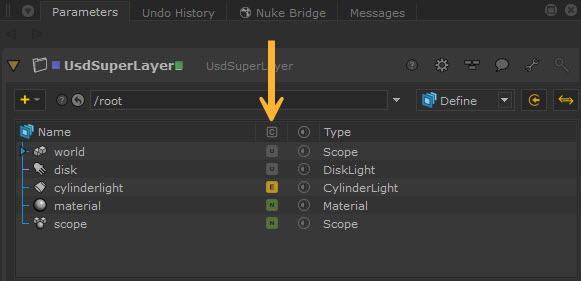
| 3. | Once selected, the prims will be added to the layer. In this example, a material and a scope has been added to this UsdSuperLayer. You can add as many prims as you need to the layer. |
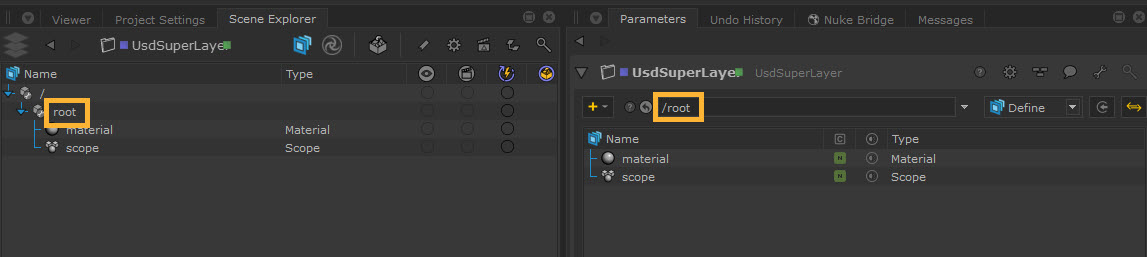
| 4. | The Prim Path toolbar shows you the path under which your prims are created in the Scene Explorer. This can be edited if you wish to change the path. |
Note: You can also rename or remove the prims themselves in the treeview by right clicking on the prim and selecting Rename or Delete. Note that prims can be renamed only if they’ve been created locally to that node. USD doesn’t have a concept of deleting between layers, so if an upstream prim gets picked up, the Rename or Delete option will not be available. You can either go upstream to delete the light where it was created or disable/set the visibility to off in order to remove its contributions.
Note: There are several ways to copy and paste lights using the UsdSuperLayer node, such as Copy Composed and Duplicate - see Copying and Pasting Prims.
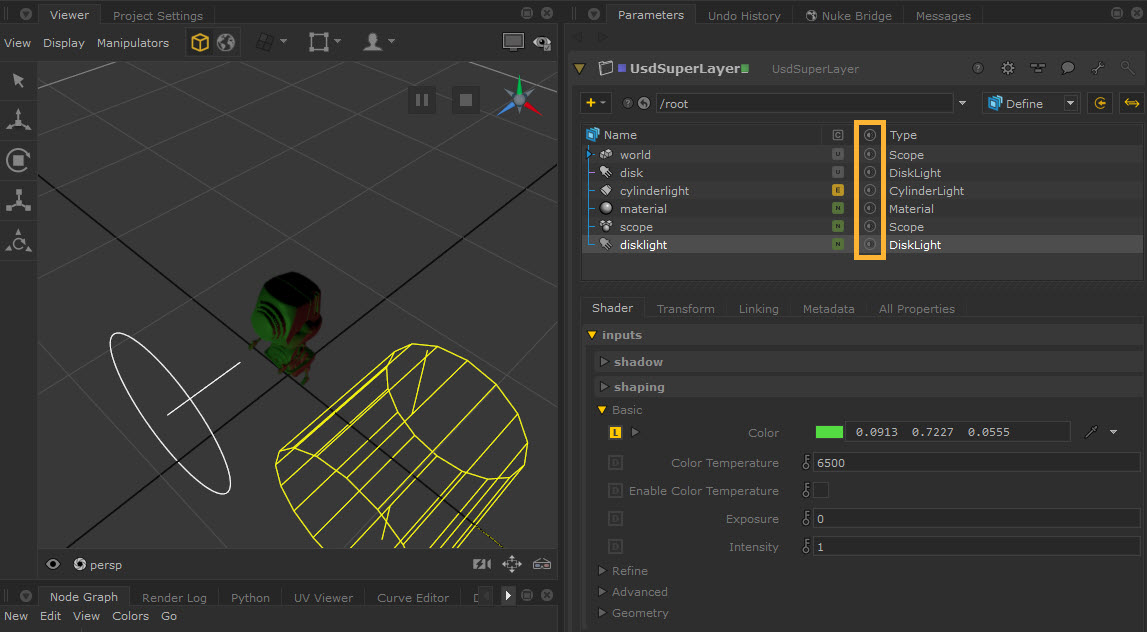
| 5. | When you select each prim in the UsdSuperLayer treeview, you’ll be able to view and edit its parameters in the panel beneath. |
Depending on the prim you select, the options in the Tab menu and Properties will adjust. To learn more about the options for lights, see Editing Light Parameters (as the options for light prims in UsdGaffer and UsdSuperLayer are the same).
Note: Each tab represents a ParametersHandlerPlugin under the hood where its priority in ranking and its label can be adjusted.
Adding Incoming Prims
The showIncomingscene button gives you the option to show other prims in your scene if they have been imported or created using other nodes.
Tip: Before adding them, make sure that they are under the same location as the rest of your prims in the UsdSuperLayer, eg. /root.
When enabled, these prims will show in your treeview with a grey Unchanged state. You can then edit them from here. Be aware that any changes will only be reflected if they are made inside the UsdSuperLayer rather than the original source.
If you edit any incoming prims via UsdSuperLayer, they will then show with the yellow Edited state. This is essentially saying that the incoming prim has been overridden.
Tip: If you have added geometry as an incoming prim to the UsdSuperLayer, you can then use the treeview to add a MeshLight to it, creating an effect where light comes from inside the mesh. This will edit the existing mesh to apply mesh light API and shading and shaping API. See more about this workflow at Creating Mesh Lights.
Viewing Prim States
In the treeview you can easily differentiate between local, upstream, and downstream changes. The colored labels in the  column give you an indication of this:
• 'U' for inbound prim that has no edits (Unchanged state)
• 'E' overs as an edit on an incoming prim (Edited state)
• 'N' for locally created prims (New state)
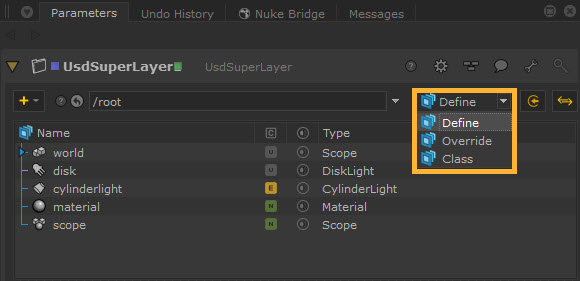
Changing Prim Specifiers
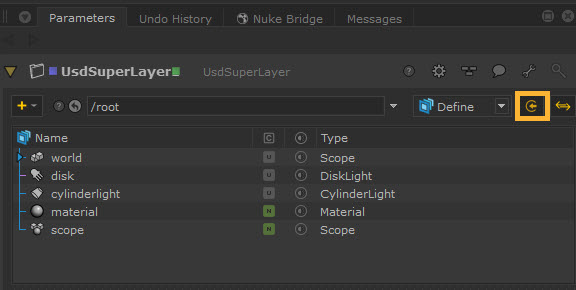
You can change the prim specifiers of your treeview by selecting the dropdown. This determines how the prim is treated during composition and has the following options:
• define - create the primitive in the scene.
• override - an over prim that is used only to override opinions that exist in the scene.
• class - for defining default attributes using a class template.
Changing this will impact all of the prims inside your treeview, except those which already have a different prim specifier set (if they are incoming prims).
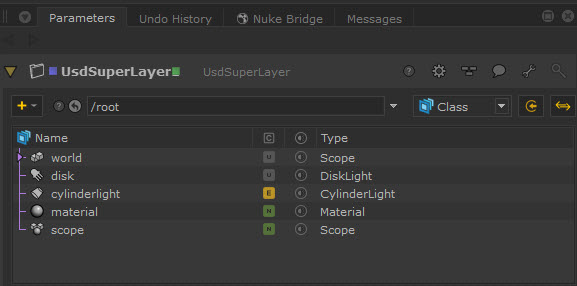
For example, here all Prims are set to Define. The ‘disk’ has already been set as a ‘class’ so it and its descendants are not affected.
In this example, all Prims are set to Class. Notice that the tree is now purple.
The styling follows the same rules as the Scene Explorer. See Styling in the Scene Explorer.
Selections
To control whether UsdSuperLayer affects your Scene Explorer selections, you can use the SyncSelection button.

The following three options are available:
• off: Selections are independent from the Scene Explorer.
• out: Selections in the node are synced to the Scene Explorer, but selection in the Scene Explorer is not synced to the node.
• in/out: Selections are synchronized both ways in the node and the Scene Explorer.
The SyncSelection button is set to in/out by default.
Changing Visibility
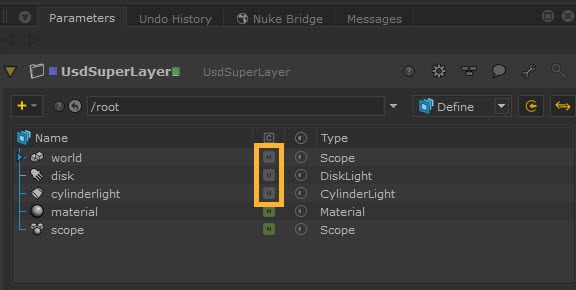
You can change the visibility on the respective prim by either using the toggle in the treeview or changing the visibility property in the Parameters > All Properties > visibility.
The visibility column toggle in the treeview can be especially useful for turning lights on and off quickly to be able to view how each of them affect the scene.
Select the icon in each prim’s row in the visibility column to turn off or on the visibility of the prim, or use the column heading icon to toggle all prims at once.
• This icon shows that the lights are visible (either inherited or local visible): ![]()
• This icon shows that the light is invisible (either inherited or local invisible): ![]()
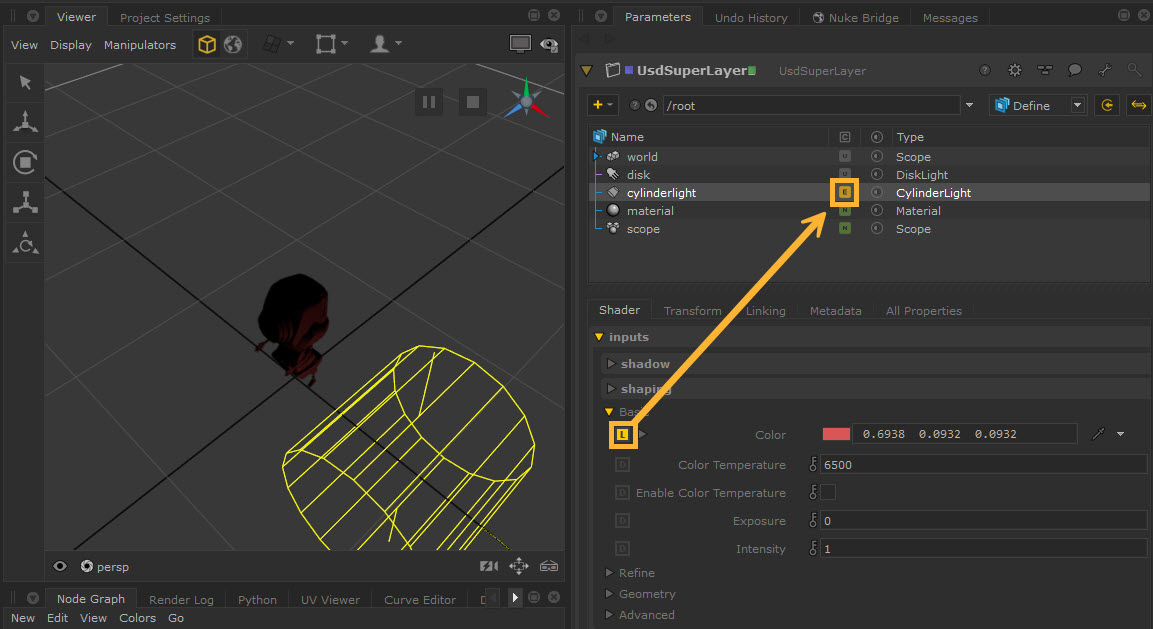
For example, turning the green DiskLight to invisible allows you to focus on the CylinderLight and more clearly see the effect of its subtle red light.
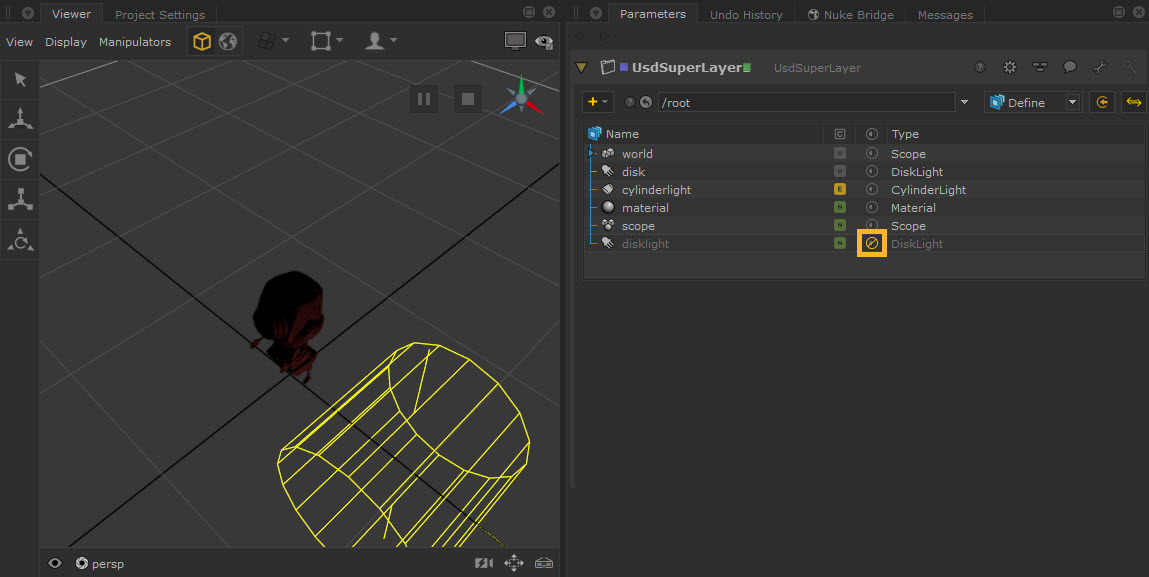
Toggling each prim’s visibility allows you to affect what you see in the Viewer.
Tip: It can be helpful to toggle the visibility of the camera so you can more clearly see your geometry.

When you change the visibility of an incoming prim, it will only change locally. You can hover over the visibility icon to see the details.
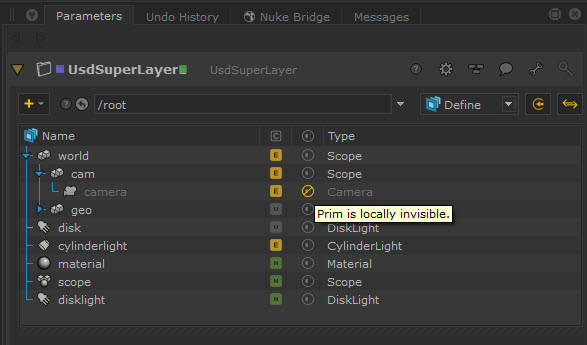
There are four visibility states: inherited, local visible, local invisible and inherited invisible, but toggling it in the treeview will only swap between the following three: inherited, local invisible and local visible.
Positioning and Transforming Prims
• You can look through USD lights and cameras that are part of the UsdSuperLayer in the Viewer to help with positioning. This works in the same way as the UsdGaffer node - learn more about this at Positioning with Look Through Lights.
• Use the Viewer manipulators to transform USD lights and other prims in the Viewer. UsdSuperLayer prims support Translate, Rotate, Scale and Center of Interest. Read more at Transforming Lights and Viewer Manipulators for Native USD.
• You can also use the Lighting Tools manipulators with UsdSuperLayer lights. However, note that other components in the Lighting Tools (such as light creation or light material changes) do not yet support USD lights. This works in the same way as the UsdGaffer node - learn more about this at UsdGaffer and Lighting Tools.