Object Facing Gradient Node
Access: Nodes > Projection > Object Facing Gradient
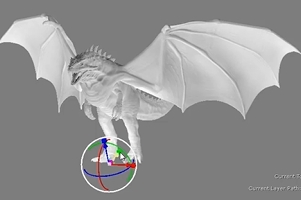
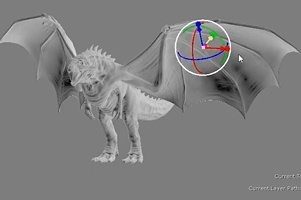
The Object Facing Gradient node creates a gradient based on object facing in relation to a locator. You can control the gradient between the start and end colors using the Facing Blend controls and assign multiple projectors to the node to create as many gradients as you require from any angle.
|
|
|
|
The gradient changes dependent on geometry facing in relation to a locator. |
|
Object Facing Gradient Node Inputs
| Start Color |
Sets the start color of the gradient, which is applied to geometry closest to the locator. |
| End Color |
Sets the end color of the gradient, which is applied to geometry farthest away from the locator. |
|
Position |
An optional input to set the start coordinates of the gradient. |
|
Normal |
An optional input to feed in a normal map to determine geometry facing. |
Object Facing Gradient Node Outputs
|
Output |
A facing gradient calculated from locator position in relation to geometry. |
Object Facing Gradient Node Properties
|
Mode dropdown |
Sets how the facing from the geometry to the locator is calculated, either planar on two axes or 3D. 3D mode gives you full control over the locator to produce the gradient you require. |
| Start Color
swatch |
Sets the default start color of the gradient if nothing is connected to the Start Color input. |
| End Color
swatch |
Sets the default end color of the gradient if nothing is connected to the End Color input. |
| Facing Blend: Start
numeric field, slider |
Sets the facing angle at which the gradient blend begins. Facing angles greater than this value blend towards the End Color. |
| Facing Blend: End
numeric field, slider |
Sets the facing angle at which the gradient blend ends. Facing angles less than this value blend towards the Start Color. |
|
Absolute checkbox |
When enabled, all negative facing values are considered positive and given the same value. |
| Object
dropdown |
Selects the object to use as the basis for the facing gradient. You can use one of the standard options, objects, cameras, and lights, or create a custom locator by pressing the + button. |
|
|
Click to add a locator to the scene to control the gradient applied to your geometry. |
|
|
Click to switch to the Transform Selected Objects tool so you can move the selected object around the scene. |
|
|
Click to show and hide the transform controls at the bottom of the panel. |
Related Nodes
• Camera Distance Gradient Node