Working with MeshFusion Assemblies
Modo provides a number of procedural MeshFusion Assemblies, which allows you to work with simple geometries and familiar direct modeling workflows and tools. For example, to improve your Game Engine workflow, use these MeshFusion assemblies with high polygon assets to quickly design your models. These assemblies provide the ability to fuse complex procedural geometry to broaden the applicability of that geometry. You can freely combine procedurals and direct modeling geometry into complete models that would otherwise be difficult to achieve using direct modeling techniques.
Tip: The MeshFusion Item Assemblies are no longer included with Modo but can be downloaded from the Preset Browser Cloud Assets > AddOns > Foundry section. Moving the assemblies outside the application, allows us to update and improve them independently of the Modo release schedule.
Adding a MeshFusion Assembly
Tip: To improve the performance, you can enable the MeshFusion property Deferred Updating. Updating is then only seen when you move your mouse upwards in the 3D Viewport. For more information, see Fusion Item.
To add a MeshFusion assembly:
| 1. | From the Preset Browser, click Cloud Assets > AddOns > Foundry and download the assemblies. |
| 2. | Open the Model layout. |
| 3. | In the right panel, open the Items list, and select a Fusion Item or mesh item. |
| 4. | In the right panel, click Add Item, and expand Assemblies > Item Assemblies > MeshFusion Assemblies. |
| 5. | Double-click on an assembly to add it to your scene. |
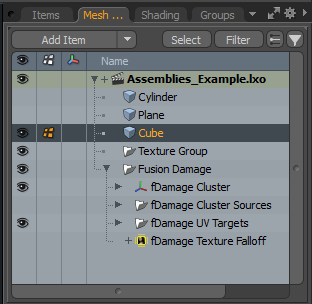
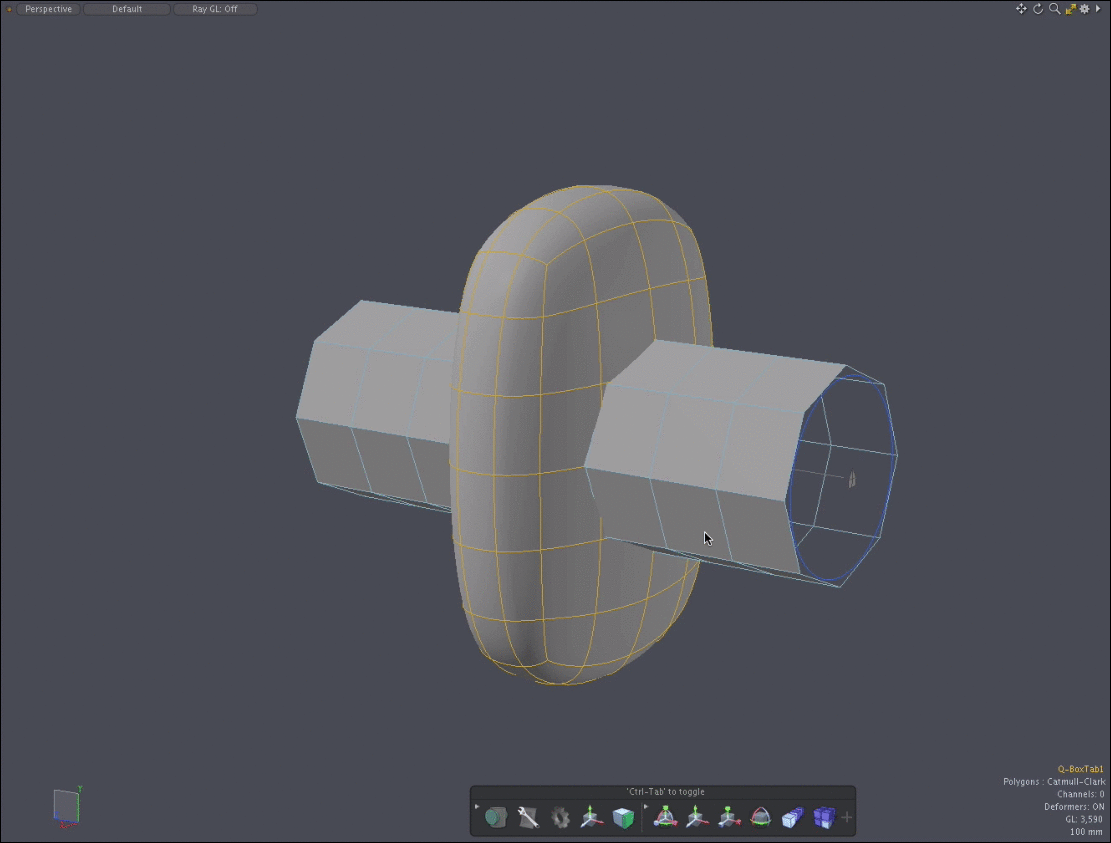
| 6. | Open the Mesh Ops tab to view the assembly components. In this example, I have added the Fusion Damage MeshFusion assembly to the Cube mesh item. |
Procedural MeshFusion Assemblies
|
Assembly |
Description |
|
ElboPipe |
Creates piping consisting of straight segments and relatively short bends (with optional elbow joint geometry at the bends). Uses Pen Extrude Mesh Operation to create your ElboPipe curves. You can create a path as a polyline to create elbows around the geometry. As a result, the geometry is automatically added at each vertex of the polyline. Tip: While this assembly was designed with Fusion-friendly source meshes in mind, it is also useful when designing non-Fusion models. |
|
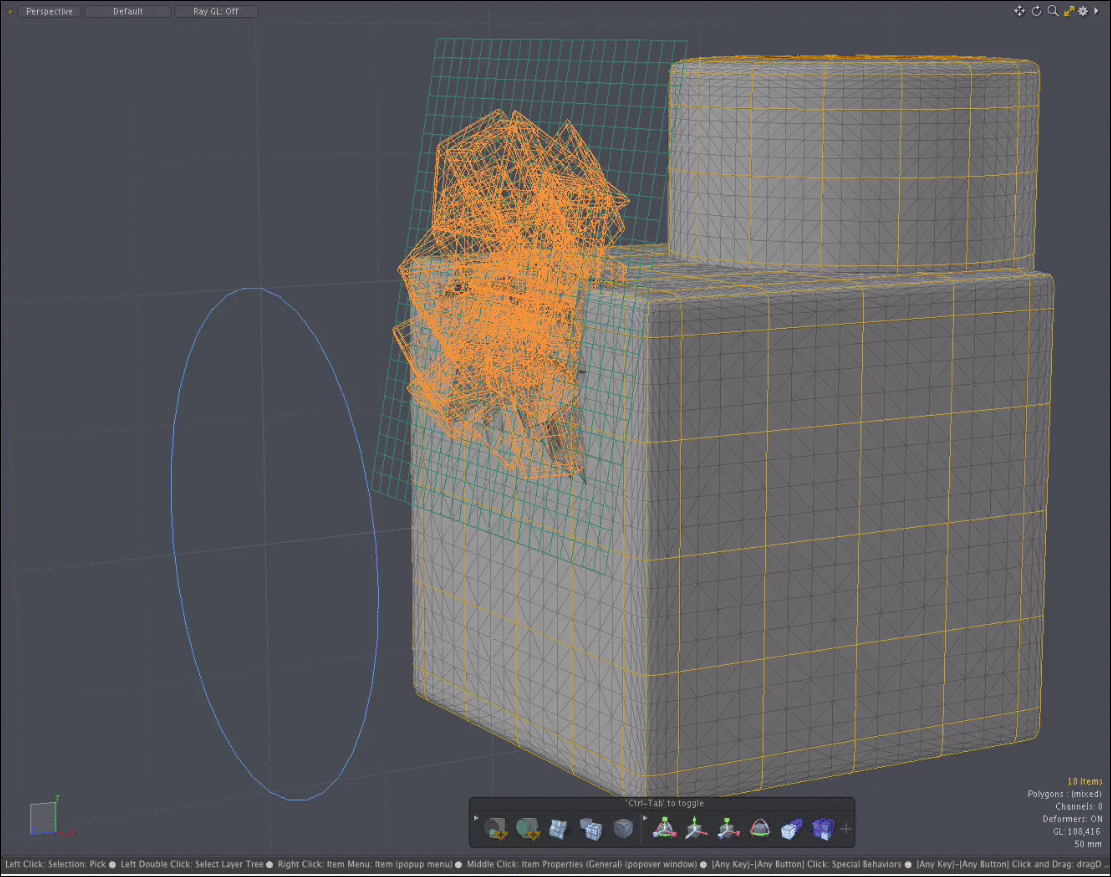
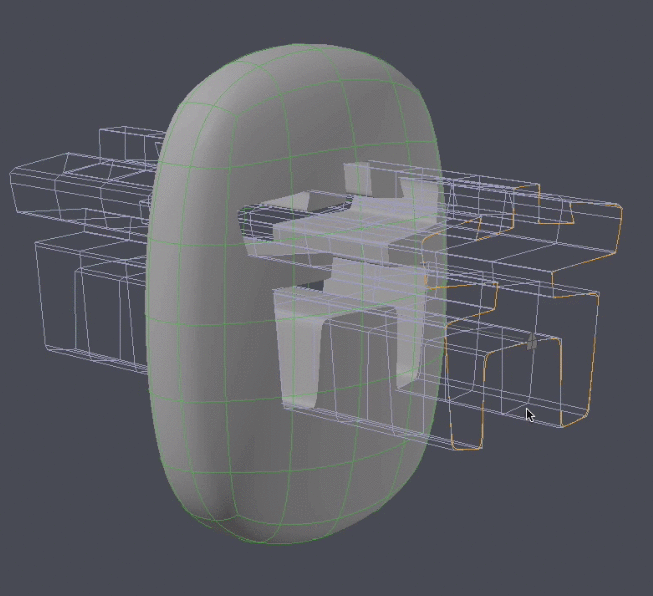
Fusion Damage Trim |
Combines individual meshes that act as subtractive Fusion Trims and a plane that acts as the target for a procedural UV transform. The individual meshes are being mapped into the UV space of the plane. The plane has a procedural Bend Effector Mesh Operation applied to it, which allows you to shape the trims to fit to the geometry of the Fusion Item. This assembly creates trims from the Primaries. Click the image below to view an animation.
Tip: You can relocate individual meshes in the Damage Cluster Mesh Operations list by selecting them and applying the transform tools. Therefore, affecting where they fall on the UV transform target plane.
|
|
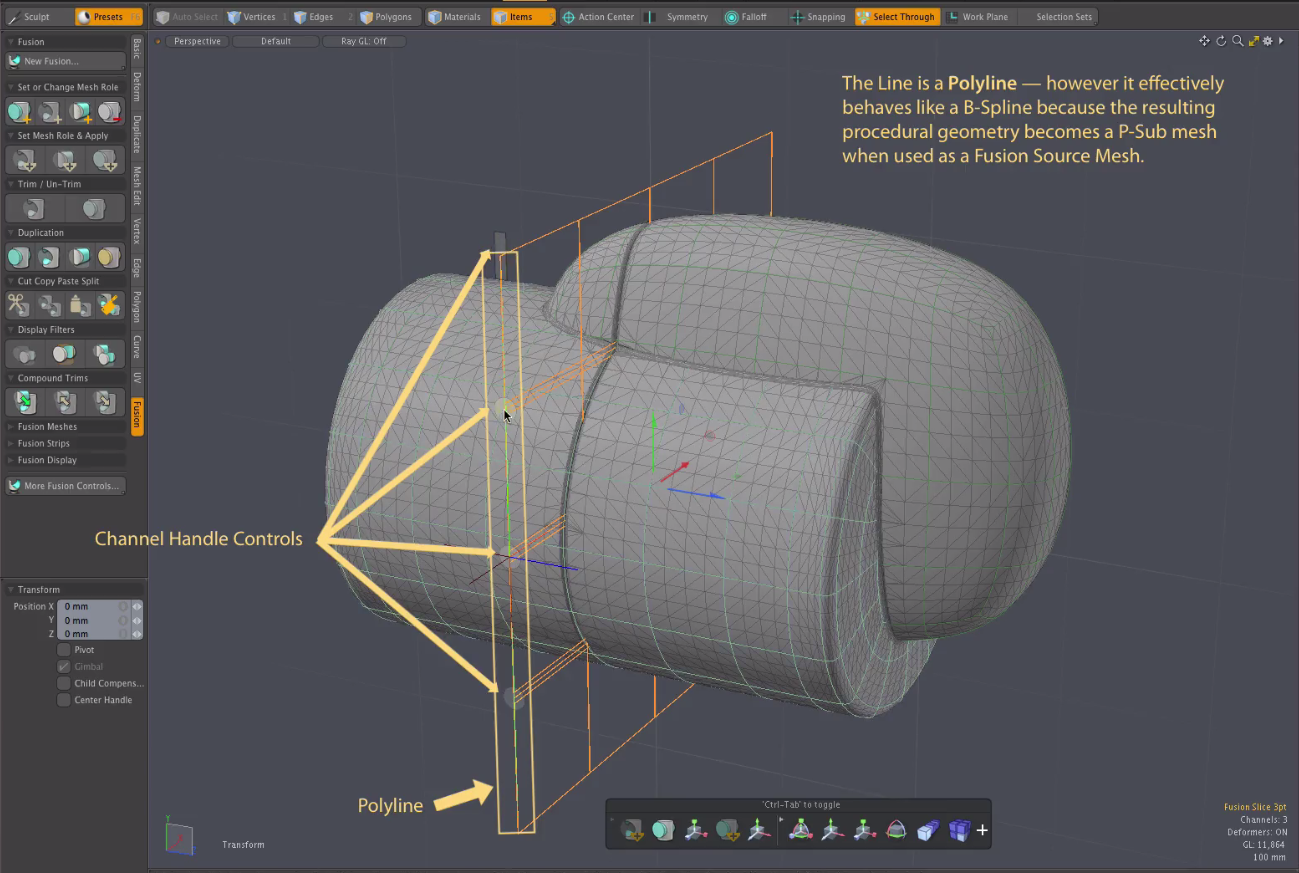
Fusion Slicer 3Point |
Creates a thickened plane with three control points that allows you to set the path of your slice. This assembly has a Locator that is used to transform the assembly, Channel Handle controls, a B-Spline, and a polyline used to slice. All of the components of this assembly are seen in the Mesh Operations list. |
|
Fusion Slicer 7Point |
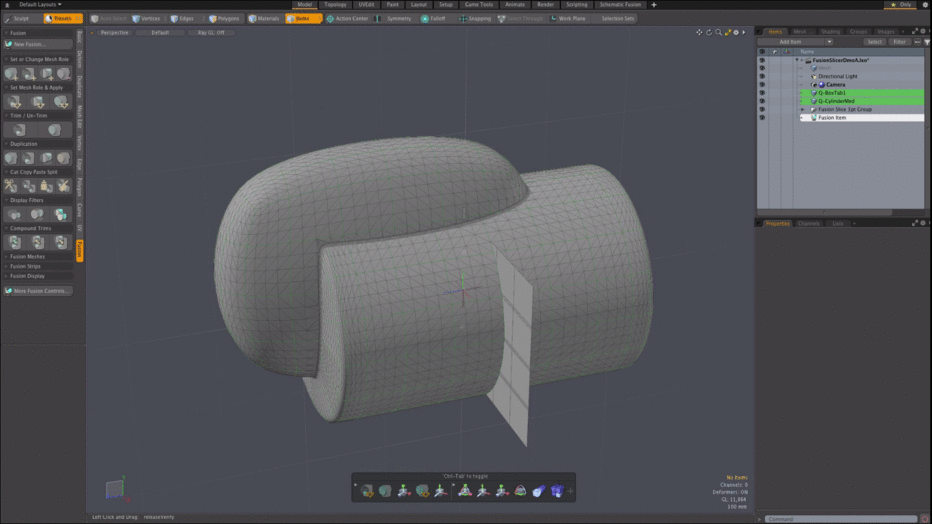
Creates a thickened plane with seven control points that allows you to set the path of your slice. This assembly has a Locator Item that is used to transform the assembly, Channel Handle controls, a B-Spline, and a polyline used to slice. All of the components of this assembly are seen in the Mesh Operations list.
Once added to your scene, use the Transform tools to move and scale the slicer to the appropriate position on your model. Select the primaries and the slicing plane to trim. In the Toolbox, on the left panel, click Set new mesh to Subtractive Trim and apply to selected meshes. The geometry is sliced. Click the image below to view an animation.
|
|
Profile Sweep |
Creates a procedural profile that you can apply to your Fusion Item or other modeled geometry. This assembly also supports a mesh to use as the profile as opposed to the Spline based profile. In addition, from the Model layout Toolbox Fusion sub-tab, you can change the profile to use one of the many Fusion Meshes > Fusion-Ready Presets > pFusion Profiles. To add the Profile Sweep assembly to your scene, drag-and-drop it onto the Fusion Item source mesh and select the type of fusion you would like to perform from the contextual menu. For example Fusion: Apply Subtraction. Click the image below to view an animation.
To change the assembly profile to use another Fusion-Ready Presets Preset, open the Toolbox Fusion sub-tab on the left panel. Then click MeshFusion > Fusion-Ready Presets. Navigate to pFusion Profiles and select a new profile. Then select a source item (polygon, item, or mesh) and the Fusion Item from the Mesh Operations list. Right-click on the assembly widget to select Import Browser Profile from the contextual menu. The new profile is applied. Click on the image below to view an animation.
|
|
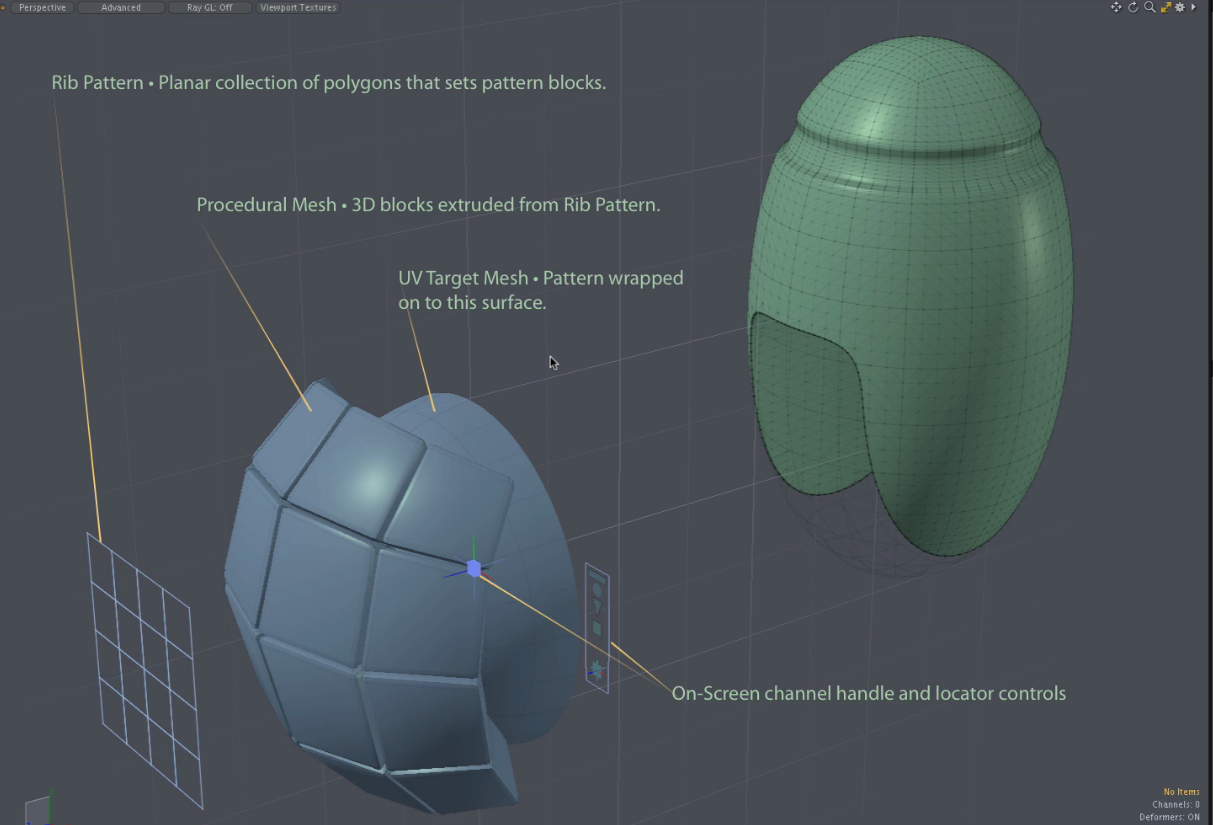
RibTrim |
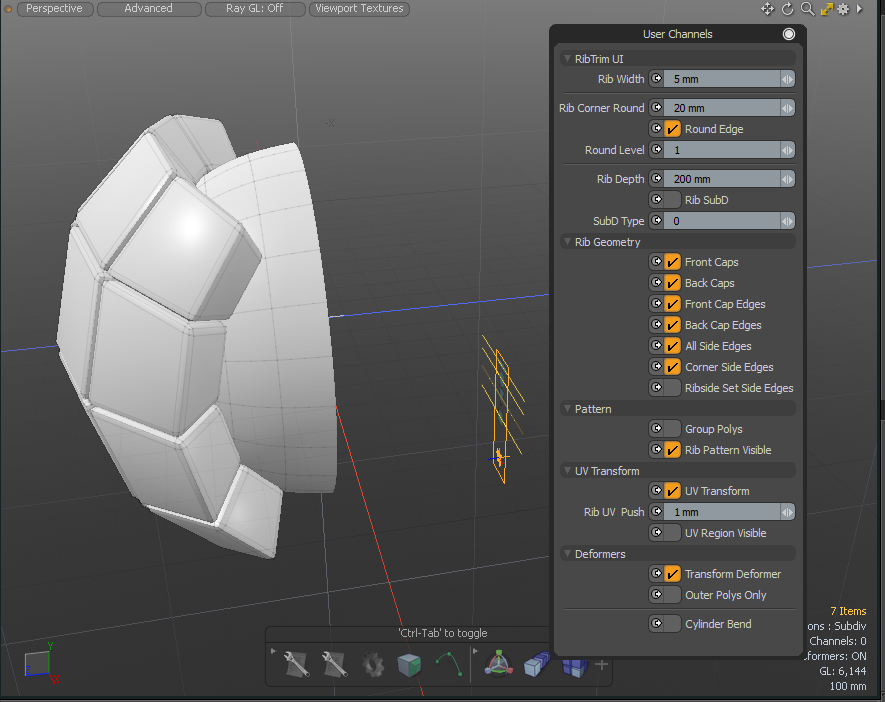
Automates the creation of frame, rib, and tile structures. This assembly creates patterns of edge looped blocks that may be used as Fusion Trims or Mesh Roles and Relationships. The blocks are aligned to selected geometry using a procedural UV Transform and / or a procedural Deformer. You can create and edit patterns as simple 2D meshes by creating planes with an arbitrary arrangement of polygons. For more information about Deformers, see Applying Deformers.
Tip: You can transform the RibTrim channel controls to a new location in your scene and double-click it to view the User Channel options. |
Related Videos
ElboPipe Assembly
Introduction
Avoiding Twisting
Path Profile Swap
Fusion Damage Trim
RibTrim Assembly
Introduction
Example
Pipe Assembly
Performance