Vertex mapping does not directly relate to texture mapping, but it can play an important role when texturing models for rendering. Vertex mapping is a means of storing vertex-specific information within a model for variety of uses. Vertex maps may act as instructions to tell a certain function how to act upon a model (as with Weight Maps). Some Vertex Maps store positions' offset information (as in morph maps). They can also store 2D coordinate information to define how textures apply to a surface by way of a UV map. Regardless of the map type, Vertex Maps are essential to working in 3D. As with modeling, there are a variety of options for creating, displaying, and working with Vertex Maps in Modo.
Weight Maps
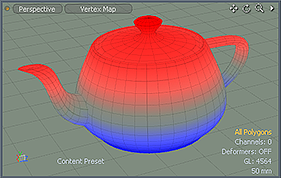
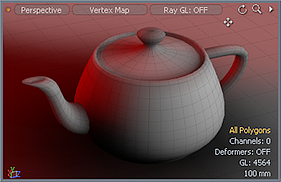
Weight Maps are discontinuous, one-dimensional Vertex Maps holding weight percentages. You can use Weight Maps for a variety of purposes. For example, a Weight Map can modulate the strength of a tool's effect when combined with a weight falloff operator. As another example, you can control the smoothing properties of a Subdivision Surfaces model by adjusting the subdivision Weight Map - essentially controlling how round or sharp a corner crease becomes when converted to Subdivision Surfaces. The Shader Tree can use Weight Maps for modulating surface attributes with masks and gradients. You can also export Weight Maps to other applications that support them for use in texture or deformation modulation. When you set a 3D Viewport to Vertex Map shading mode, Modo represents a weight value of 0 with a neutral green shade; a negative weight value shows with a blue, “cool” shade; and a positive value appears as a red, “warm” shade.
UV Maps
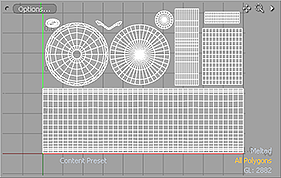
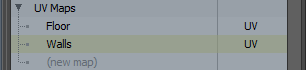
You use UV maps to explicitly link vertices in the 3D mesh to locations on a 2D image for high-accuracy texture mapping. Modo stores UV maps as discontinuous, 2D Vertex Maps with values for UV coordinate space data. The UV map can be though of as a method to unfold any 3D mesh so that it lays flat and allows the 2D image to be applied to the mesh more accurately.
Morph Map
Morph maps offer a means of saving alternate, non-destructive deformations for any model. You can animate individual morph map deformations over time. For example, this provides the ability to animate a facial expression. To animate any morph map, you must first apply a morph deformer to the model. Modo supports two varieties of morph maps: relative and absolute. Relative morph maps offset a particular vertex relative to its current position. An absolute morph map positions a vertex to a specific absolute position. Relative Vertex Maps are the more common variety. The main benefit to working with morph maps in Modo is that if you make any topology changes to a specific morph map, Modo applies those changes to all the associated maps.
Modo provides support for RGB and RGBA vertex color maps. Many use vertex color maps in games to provide additional color variations in combination with texture maps to simulate a fully-shaded environment with little (to no) CPU shading overhead. You can paint vertex color maps with the Vertex Map > Color Tool combined with an airbrush-type falloff.
Vertex Normal
Vertex normal maps work in tandem with the smoothing function to shade polygons as either faceted or smooth. A vertex normal map is a map with the values of the Smoothing setting baked into the vertices. Most often, you generate vertex normal maps in an external CAD package when converting a NURBS-based model to polygons. The normal values are computed from the smooth NURBS surface to eliminate smoothing errors of the highly triangulated polygonal surface when rendered elsewhere.
Particle Maps
Particle maps are useful to give you control over particle- and volume-related items (such as when using point clouds for Replicators and Texture Replicators) and for use with blobs, volumes, and sprites. (Point clouds are just masses of particles.) Particle maps include dissolve maps, which control the opacity of individual particles, and size maps, which control the scale of individual particles.
NOTE: Particle maps cannot be applied to procedural particle items, such as particle clouds and the Particle Generator.
Transform Maps
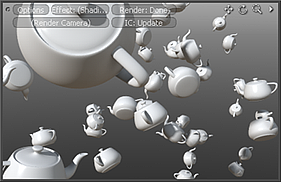
Vertex transform maps are useful as they give you individual control over Replicators. You can apply a transform map and then select a target vertex (with a replicated element applied). With the standard transform tools, you can adjust rotations, scales and positions on an individual particle basis.
Vector Maps
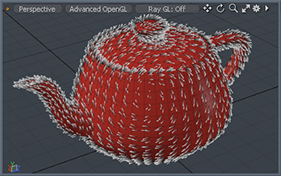
With vertex vector maps you can comb and (to a degree) style fur by using an embedded Vertex Map instead of resorting to more complex image maps or guides. Vertex vector maps also work in a similar fashion to control the scale and orientation when applied to Replicators when you use a Surface Generator as a point source. This avoids creating unnecessary UV maps and keeps objects self-contained in that they don't require any external assets to function.
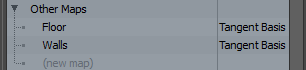
Other Maps
Modo also supports various other maps types, such as pick maps. Having other maps available is mainly for storing of selection sets and retaining compatibility with other applications.
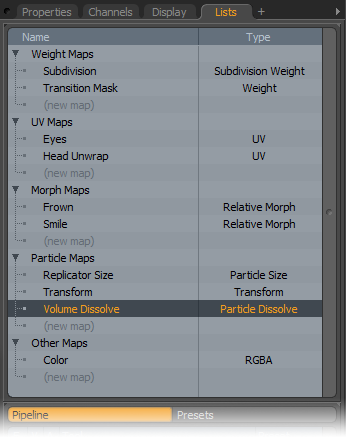
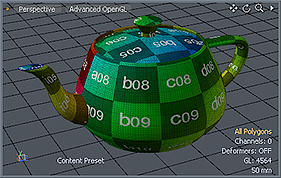
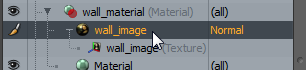
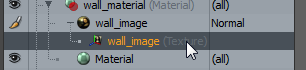
Modo stores map-specific information within the model, itself, at the vertex level, but Modo organizes Vertex Maps, like item layers, in the Lists viewport panel. Within the viewport, you can select maps to make them active for editing. You can also create, delete, and rename maps from within the Lists view. You access the various options by right-clicking a Vertex Map's name and choosing one of the available commands. In general, you may not work with the List view as much as the Item List or Shader Tree viewports, but the functions it provides are essential to working with Vertex Maps. All the attributes of the viewport are covered in the Vertex Map List viewport topic.
TIP: Vertex maps are item-layer specific with each Mesh Item having its own dedicated maps. The only maps visible within the Lists viewport are for layers that are visible (controlled by the Item List). Different layers can share map names (and usually do if you use the default names that Modo generates), but this can cause collision problems and produce incorrect results when baking out texture maps for rendering or export.

Before adding a map to a mesh, first determine the type of map required.
|
Map Type |
Description |
|---|---|
|
Weight Map |
Weight strength values stored for falloff and texturing purposes |
|
SubD Weight Map |
Weight strength value influences edge creasing in SubDivision Surface geometry |
|
UV Map |
UV maps translate 3D vertex positions to flat 2D coordinates |
|
Relative Morph Map |
Vertex position offset is relative to the base vertex position |
|
Absolute Morph Map |
Vertex position is offset to a specific absolute position in 3D space |
|
RGB Map |
Vertex color map is defined by R, G, and B color values |
|
RGBA Map |
Vertex color map defined by R, G, and B color values and an additional A (Alpha) value |
|
Pick Map |
Like a selection set, defines groupings of vertices |
|
Vertex Normal Map |
Surface normal direction (smoothing) values stored as fixed value |
|
Edge Pick Map |
Like a selection set, defines groupings of edges |
|
Particle Size Map |
Determines scale values for individual particles |
|
Particle Dissolve Map |
Determines transparency values for indvidual particles |
|
Transform Map |
Determines transform amounts for individual vertices or particles |
|
Vector Map |
Determines length (or scale) and orientation over the target elements |
|
Tangent Basis |
Surface normals in Mikk tangent space |
You can create a new map by using the Vertex Map > Create command. In the Create New Vertex Map dialog where you can select the map type, define a name for the map, and set a base value. After you click OK, Modo creates the map for the currently selected Mesh Item layer(s) with the named map immediately available within the appropriate section of the Lists viewport. You may also select(new map) available directly in the Lists viewport under each map type. Doing this also opens the Create New Vertex Map dialog, but Modo specifies a pre-selected map type based on the viewport's map type.
You can rename maps either by right-clicking a map name and choosing Rename or by selecting a map within the list and choosing the Vertex Map > Name command. Both actions open a dialog where you can type the new name. Make sure to select the proper map type if necessary. Additionally, you may also use the click, pause, click method to rename the layer inline. To remove a map, select the target map and choose the Vertex Maps > Delete command, or select the layer and press the Delete key.
How you display and edit Vertex Maps depends on the map type. For most types of maps, do this directly in the 3D Viewports, which provides real-time feedback when you change values.
Weight Maps display directly in any 3D Viewport when you specify the viewport display option is set as type Vertex Map. You can edit Weight Maps by selecting components and applying values or by using the Vertex Map Weight Tool function. If you combine the Weight tool with an Airbrush falloff, you can interactively paint weight values.
UV Maps
UV maps have their own 2D viewport, which is specific to editing maps of these types. 3D Viewports only display the result of the UV map in the Texture, Texture Shaded, or Advanced OpenGL modes. Modo has a dedicated UV-editing layout, by default, with additional windows available under the Layout > Windows sub-menu.
Morph Maps
When you select a morph map in the Lists viewport, it is visible within any of the 3D Viewports in all of the various modes. When animating morph maps and applying them as deformers, you see the morph, itself, only if you select the Enable Deformers checkbox within the viewport options. (You can access these options by pressing O when moveing the pointer over the target viewport.) Enable Deformers is enabled (as the default option) for the Layout, Animation, and Render layouts, but it is disabled in the Modeling, Painting, and UV view Layouts.
Color Maps
When you select a vertex color map in the Lists viewport, Modo displays it directly in any 3D Viewport if the viewport display option is set as type Vertex Map. You can edit color maps by selecting components and applying values or by using the Vertex Color Tool function. If you combine the Color tool with an Airbrush falloff, you can interactively paint vertex color values.
Vertex Normals
Vertex normals, when present, override any smoothing settings (as defined by material item settings in the Shader Tree). You usually generate vertex normal maps in an external application and use them when rendering highly-triangulated CAD in Modo. However, with Modo you can bake the material item's smoothing results into a vertex normal map with the Set Vertex Normals command.
Vertex Vector
A vertex vector map, when active, appears as simple lines that project outward in the normal direction from each vertex in a model. When you select a vertex vector map in the Lists viewport, you can edit the map directly with the fur styling tools and modify their orientation. However, vectors are simple direction and size controls, so complex effects (such as Curl or Root Puff) won't have the same effect as they would when styling with guides. Therefore, with a vertex vector map, work with simple, short styles. You can also use vertex vector maps to control the scale and orientation of Replicators when combined with Surface Generators.
Tangent space provides a way of locating normals on a surface that differs from world space and object space. A tangent space originates from a point on a surface and has one axis that is at a tangent to the surface. The other two axes are perpendicular to the tangent, with one as the surface normal at the origin.
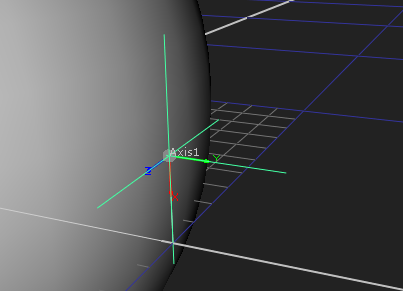
The image above shows a tangent space at a point on a sphere. The Y-axis is coincident with the surface normal.
NOTE: A Tangent Basis Vertex Map only stores its data relative to the surface. This means that the tangent space is unaffected by mirroring, rotation, scaling or translation.
Modo creates tangent space normal maps when using the Bake from Object to Texture option with an Image Map of type Normal. For more information on texture baking, see Baking Workflow.
NOTE: Because tangent space normal maps are automatically aligned to the underlying surface, a tangent basis texture can be reused when the geometry is deformed. Object space maps are less flexible as the object space changes under deformation.
Tangent space normal maps also provide certain efficiency savings over object space normal maps as they can be encoded with less data.
In 2008, Morten Mikkelsen, a student of the University of Copenhagen, wrote his masters thesis: "Simulation of Wrinkled Surfaces Revisited". In it he proposed a method for calculating surface normals in tangent space. His method solves certain problems regarding hard edges, and portability of tangent spaces between 3D graphics engines. Subsequently, Mikk tangent spaces are now supported by a number of popular engines.
Modo lets you apply a Mikk Tangent Basis to vertex maps. This provides greater compatibility with the Unreal engine and other engines that support Mikk tangent space basis.
You can add a Tangent Basis to UV Maps that are active on selected meshes. The Tangent Basis must be added before baking.
NOTE: If you edit the mesh, you must reselect Create Mikk Tangent Basis prior to the next bake to update the Tangent Basis Normal Map.
| 1. | Select the Mesh Item in the Item List. |

| 2. | If you have more than one UV Map and want to apply a Tangent Basis to certain maps, open the Lists tab and select the UV Maps. Otherwise, leave the map(s) unselected to create Tangent Bases for all UV maps. |
TIP: You can Ctrl+click to select multiple maps.
| 3. | From the menu, select Vertex Map > Create Mikk Tangent Basis. |
A new Tangent Basis map is populated for each UV map, and added to the Vertex Map List.
For versions of the Unreal Engine at 4.7 or above, you should make the following changes prior to baking:
| 1. | Select the Normal Image Map in the Shader Tree. |
| 2. | In the Properties, open the Texture Layers tab. Check Invert Green. |
| 3. | Select the Image Map's texture in the Shader Tree. |
| 4. | Open the Texture Locator tab and set the Tangent Vector Type to dPdu, Cross Product. |
NOTE: For improved compatibility, low poly meshes should be converted into triangles before baking and exporting to FBX.
Modo lets you add a Tangent Basis Vertex Map in the Vertex Map List