Shading Geometry
The nodes under the 3D > 3D > Shader node menu let you define the material attributes of geometric objects in a scene, including the quality of light reflected back to the camera from an object’s surface. Using these nodes, you can control what material your objects seem to be made of.
You can also add several Shader nodes one after the other to produce more complex effects. For this, you should use the unlabeled inputs on the Shader nodes.
Node Graph
You can insert 3D shader nodes in the following places in your scripts:
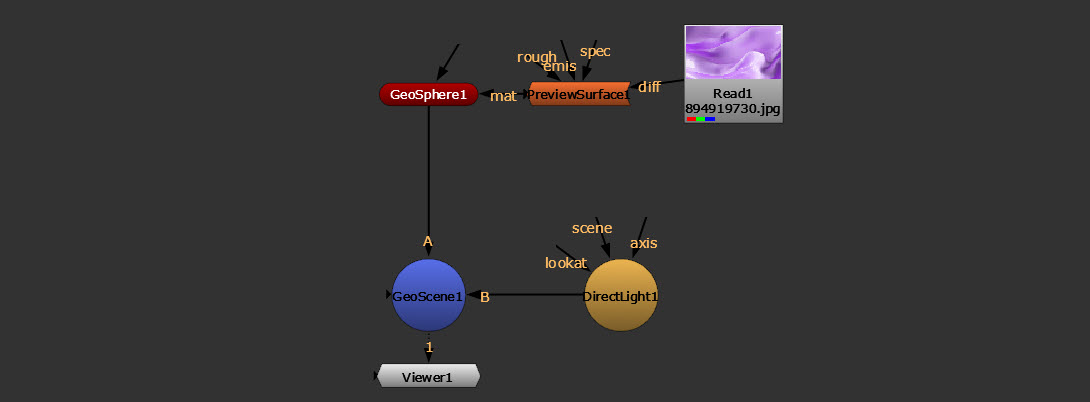
• between the 2D image you’re using for the surface texture and the 3D object node that creates the surface, as in this image:
• Or, with the GeoBindMaterial node. This is a good way to apply a global material to all objects. See steps below.
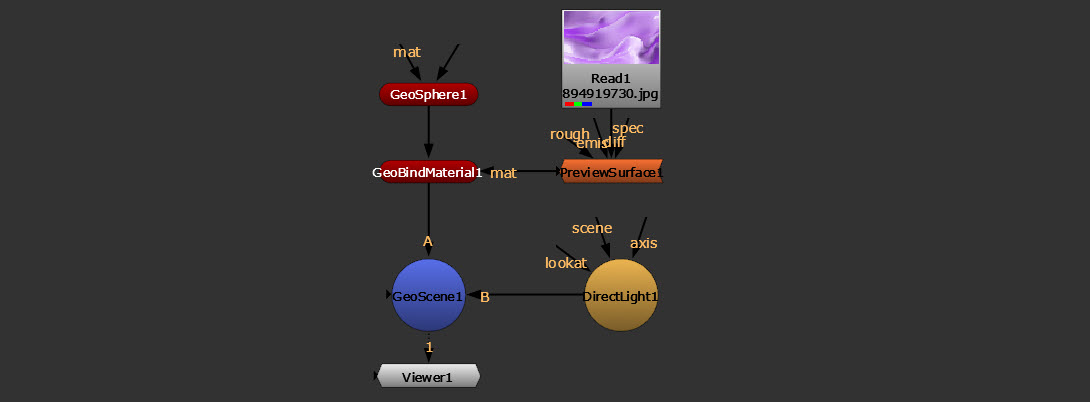
Shaders with GeoBindMaterial
The GeoBindMaterial node applies a material from the mat input to your 3D object(s), so you can add a shader node here in order to change how they will appear.
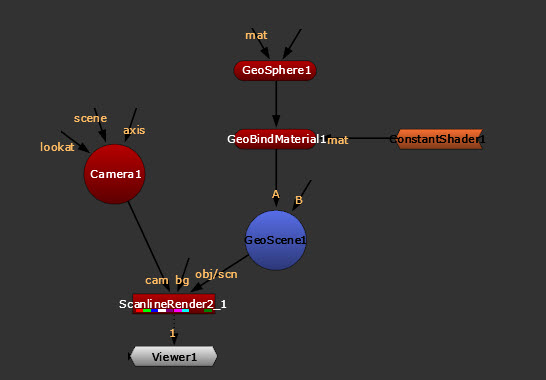
| 1. | Add a GeoBindMaterial node. |
| 2. | Connect the unnamed input of the GeoBindMaterial node to your geometry (for example, a GeoSphere node). |
Note: If you want to apply a global material to several objects, you can also connect the unnamed input to a GeoScene node. This overrides any materials applied to the individual geometry nodes before they were merged.
| 3. | Connect your shader, such as a ConstantShader node, to the GeoBindMaterial node’s mat input. See more information about different types of shaders below. |
Types of Shaders in the New 3D System
| Shader Node | Usage | User Guide |
| PreviewSurface | The PreviewSurface node represents the preview shader from the Universal Scene Description (USD) standard. It is a basic material that can be used as a standard solution when switching between pipelines and different applications. For example, a game pipeline may rely on metallic workflows and film on specular workflows. | PreviewSurface: USD Workflows |
| ReflectiveSurface | The ReflectiveSurface node has additional controls for rendering reflections. | ReflectiveSurface: Generating Reflections |
| Project3DShader | You can use the Project3DShader node to project texture images onto your 3D objects. This way, you can add detail, surface texture, or color to your geometry, making the geometry more realistic and interesting. | Project3DShader: Projecting Textures |
| ConstantShader | The ConstantShader node is used to apply a material with constant color to a prim. ConstantShader has no inputs. | ConstantShader: Color |
| FillShader | The FillShader node lets you replace selected material channels with a constant color. Typically, you would use this node to make one object hold out the others. When you set the FillShader color to 0, it acts as a “3D cookie cutter” and makes a black hole where the material would otherwise be. | FillShader: Cut Out |
| WireframeShader | The WireframeShader node allows you to render a wireframe overlay on the surface of your geometry object or particle simulation. | WireframeShader: Applying Wireframe Overlay |
| MergeLayerShader | The MergeLayerShader allows you to combine two shader nodes together, using compositing algorithms like none, replace, over, and stencil. This is particularly useful for combining multiple Project3DShader nodes, allowing you to composite 2D images projected onto the 3D geometry atop each other. | MergeLayerShader: Merging Shaders |
| MtlXStandardSurface | The MtlXStandardSurface node supports MaterialX rendering. |