What's New in Nuke, Nuke Studio, and Hiero 17.0
Gaussian Splats
You can now import, view, manipulate, render, and export Gaussian Splats natively in Nuke. Import Gaussian Splats into Nuke with the GeoImport or GeoReference nodes and view them in the Hydra--based 3D viewport.
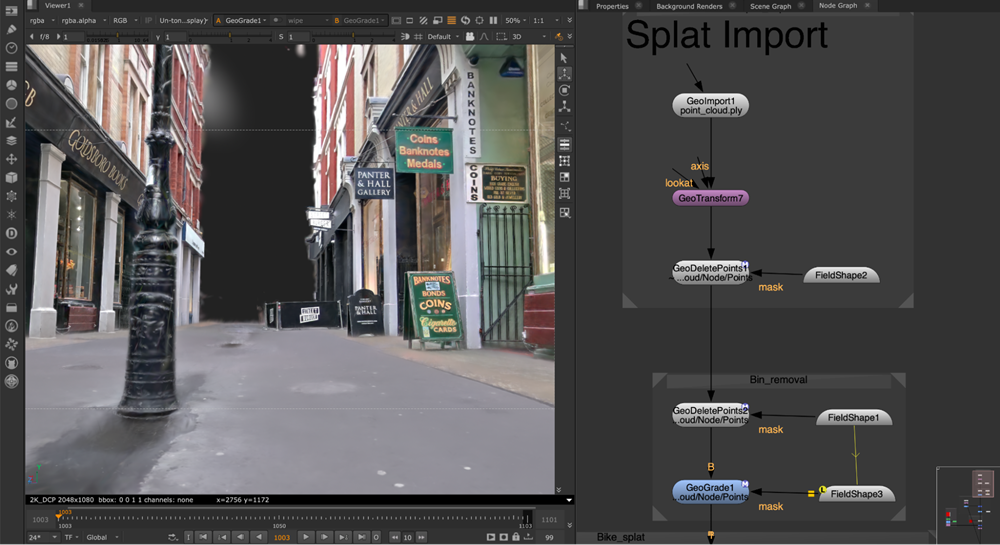
Render your splats to 2D with the new SplatRender node. Use the depth and deep output, along with motion blur, for seamless integration with other elements in your shot.
Use the new GeoDeletePoints node to non-destructively delete point data, including splats, and color correct splats with the new GeoGrade node.
Learn more about Working with Gaussian Splats.
New Field nodes
Create, combine, and transform Fields, using the new Field Nodes from the Field toolbar, to drive the manipulation of Gaussian Splats and other 3D point data.
See full details of all Field Nodes.
The New 3D System
Import | Axis | Authoring | Cameras | Projections | Materials & shaders | Lighting | Rendering | Masks in the Node Graph | UI improvements | Advanced workflow customization
Import
Import exactly what you need from large, complex 3D scenes.
Customize the data you import from the new pop-up Import Scene Graph Dialog to speed up your import workflows. Load and unload payloads, select which elements to import, and activate or deactivate prims.
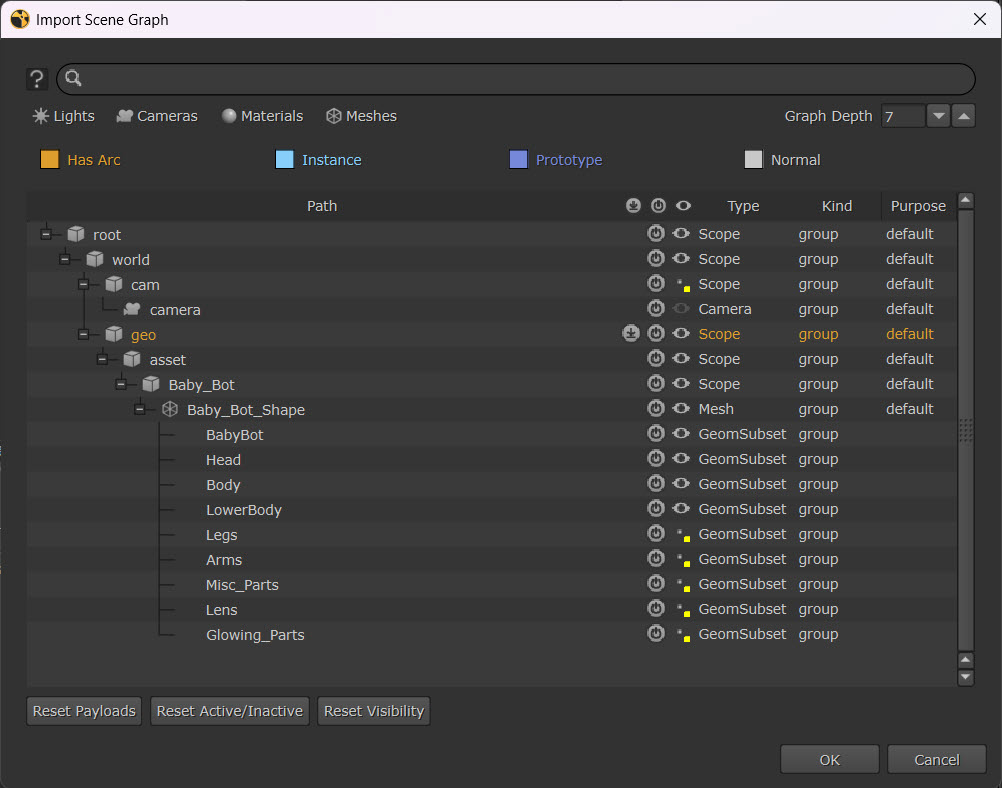
Quickly make import selections without searching through your full list of assets with keyword search, filters, and Graph Depth selection.
You can also ingest Alembic geometry and cameras in the new 3D system with GeoImport. Use the built-in scene graph to revisit and update your import selections from the 3D viewer.
Read more about Importing with GeoImport.
Axis
Pass transformation data from your stage to anywhere else in Nuke via the Axis node. Plus quickly make edits to the node with improvements to the Properties panel.
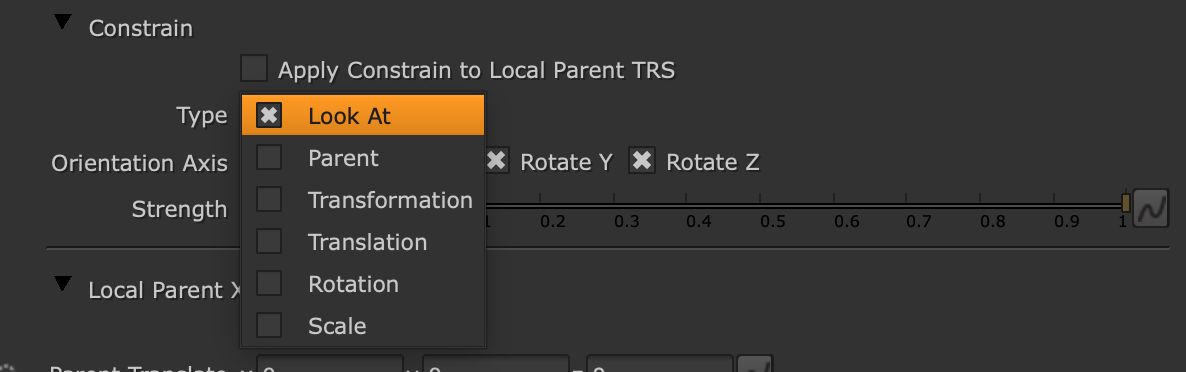
Quickly swap between constraint types — LookAt, Parent, Transformation, Translation, Rotation, and Scale — directly from Axis nodes with the new Constrain input pipe. Combine Axis nodes into the 3D system with the GeoScene node.
You can now disconnect Axis nodes from your scene, while retaining data, with the new Snapshot function, which stores a permanent copy of the data in a frame or frame range.

Note: These features also apply to the following nodes in the New 3D system: Camera, DirectLight, SpotLight, PointLight, and EnvironmentLight.
Learn about Using Axis Node in Your Scene.
Authoring
Non-destructive authoring
Working with USD is now more intuitive for Nuke artists. Authoring controls can be populated by imported USD attributes or inherited from other 3D nodes. You can then manually override imported data, and see this state reflected in the authoring mode. You can review the changes you’ve made non-destructively, by quickly toggling between the original and custom values, without reversing your edits.
Find out more about USD Concepts in the New 3D System.
Cameras
Quickly navigate the Camera node properties with improvements to the Properties panel.
All Camera locators are now viewable in the 3D viewport.
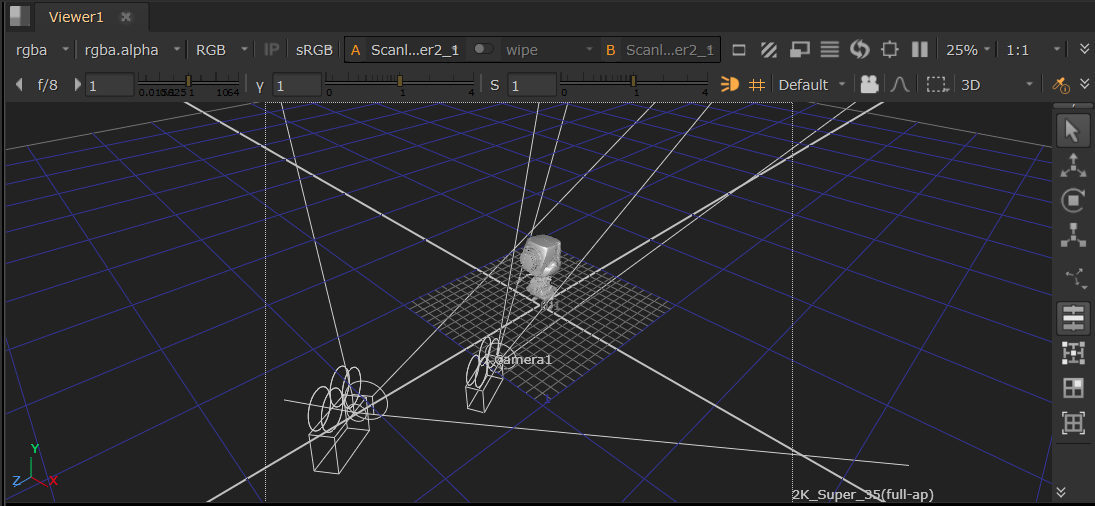
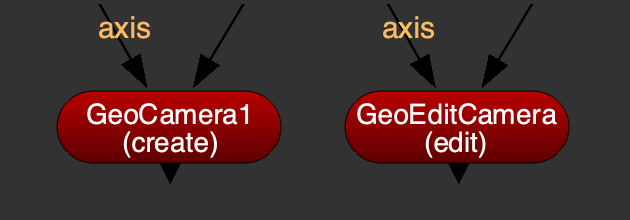
Create USD cameras with the GeoCamera node. Directly edit imported USD cameras without needing to duplicate them in a Camera node, with GeoEditCamera.
View imported cameras via the GeoImport node in the 3D viewer and its dropdown menu, and combine Camera nodes into the 3D system with the GeoScene node.
Use the new Snapshot function to disconnect a Camera node while retaining its data by storing a permanent copy within a frame or frame range.
Note: The Camera nodes also benefit from Nuke 17.0’s updates to the Axis node. See the Axis section for more information.
Read more about Working with Cameras in the New 3D System.
Projections
Sticky projections
Create sticky projection workflows by combining Nuke 17.0’s new Constrain toolset with either the Project3D, or GeoProjectUV nodes.
Stick projections to geometry at a specific frame, even as they move or deform, with the new Reference Frame knob in the GeoProjectUV node (formerly GeoUVProject). See all updates to GeoProjectUV and learn more about Projections in the New 3D System.
Projection rendering
Experience more control over your projections. The existing Camera projection modes, and two new modes, have moved to ScanlineRender.
• Cylindrical — render the entire 360-degree world as a cylindrical map.
• UV Unwrap — render each object's UV space into the output format to create texture maps with new UDIM tile options.
Learn more about Rendering in the New 3D System.
Materials & shaders
Shader nodes
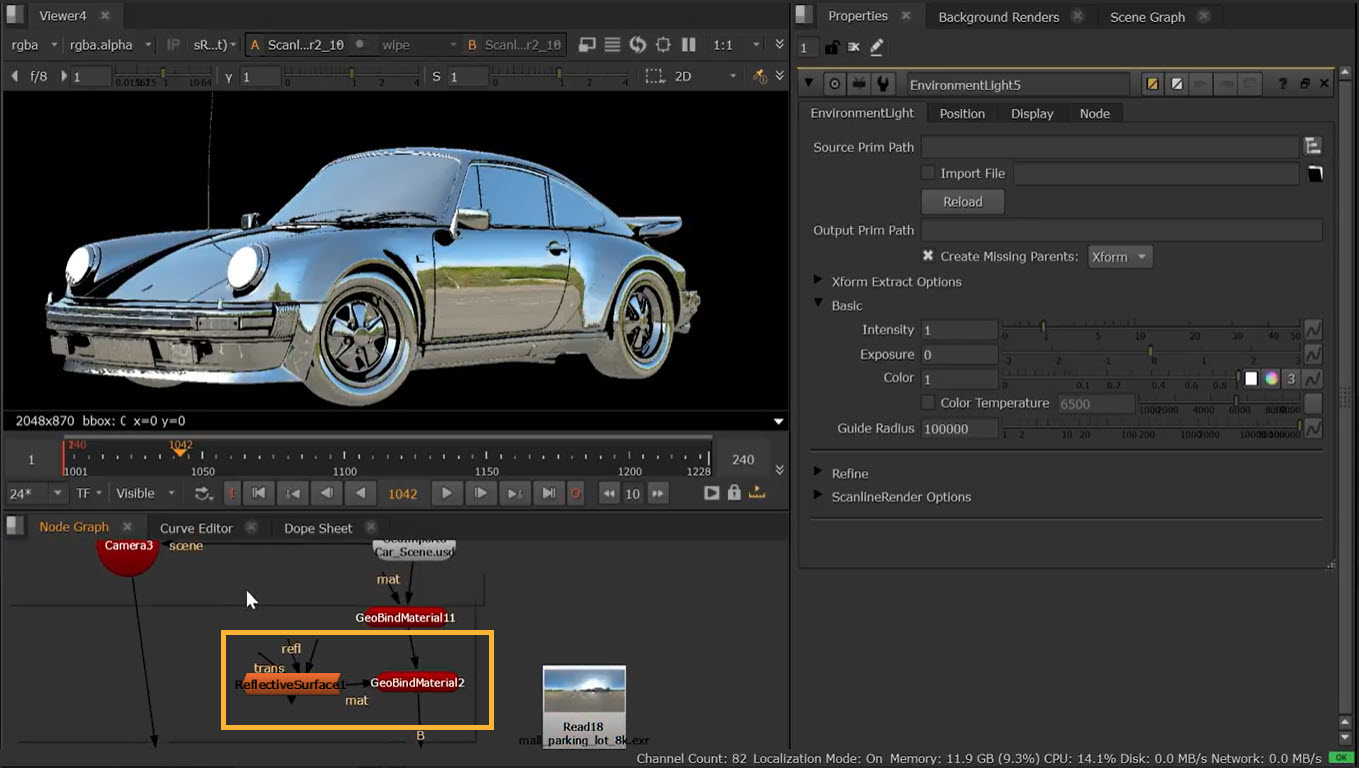
Create advanced shaders in Nuke. Generate mirror-like reflections, translucency, and transmission with ScanlineRender's ray tracing using the new ReflectiveSurface node. Learn more at ReflectiveSurface: Generating Reflections.
Adjust diffuse, specular, and emission properties from one panel, with BasicSurface, the USD equivalent to the classic system’s BasicMaterial node. Apply customizable wireframe materials or overlays for technical checks with WireframeShader, the USD equivalent to the classic system’s Wireframe node.
Also leaving beta in Nuke 17.0:
• ConstantShader — control the color and opacity of a material.
• FillShader — replace selected materials with a constant color.
• MergeLayerShader — combine two shader nodes together, using compositing algorithms like none, replace, over, and stencil.
• Project3DShader — project an input image through a camera onto a 3D object.
MaterialX
Achieve consistent visual results from lighting through to compositing, without reshading assets, with the MtlXStandardSurface node. Use this node to view and render Autodesk Standard Surface for MaterialX shaders directly inside Nuke’s new USD-based 3D system. Plus preview MaterialX shaders in the Hydra viewer, and render via ScanlineRender.
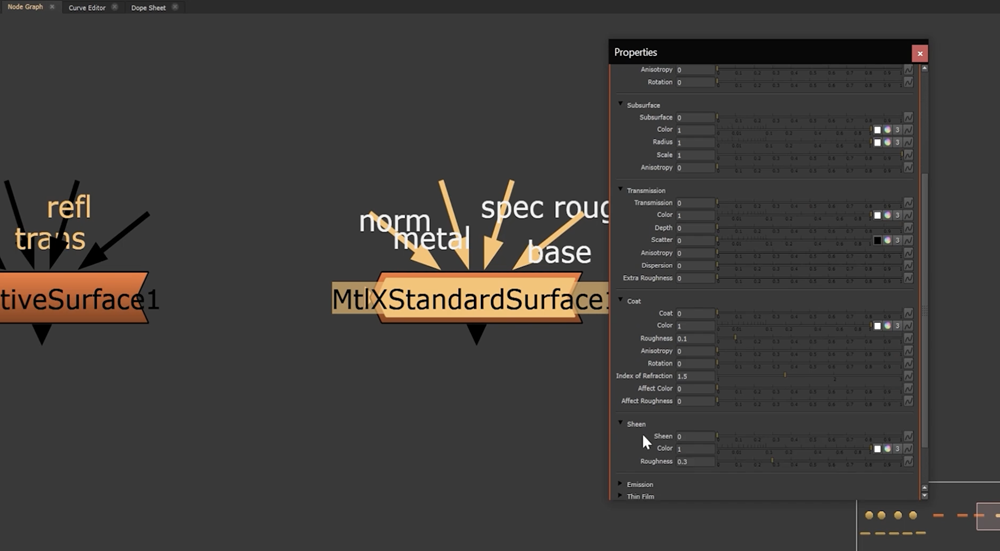
Customize the look of your materials with texture inputs: Base Color, Specular Color, Specular Roughness, Emission Color, Normal, Coat Normal, and Metalness.
You can adjust controls such as Base, Base Color, Diffuse, Roughness, and Metalness, as well as further options for Specular, Subsurface, Transmission, Coat, Sheen, Emission, Thin Film, and Geometry.
To see an example workflow, see MtlXStandardSurface: MaterialX Shader.
Material binding
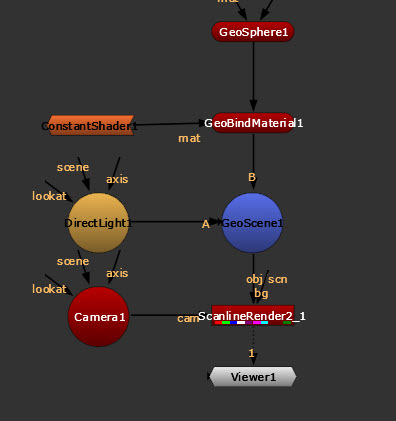
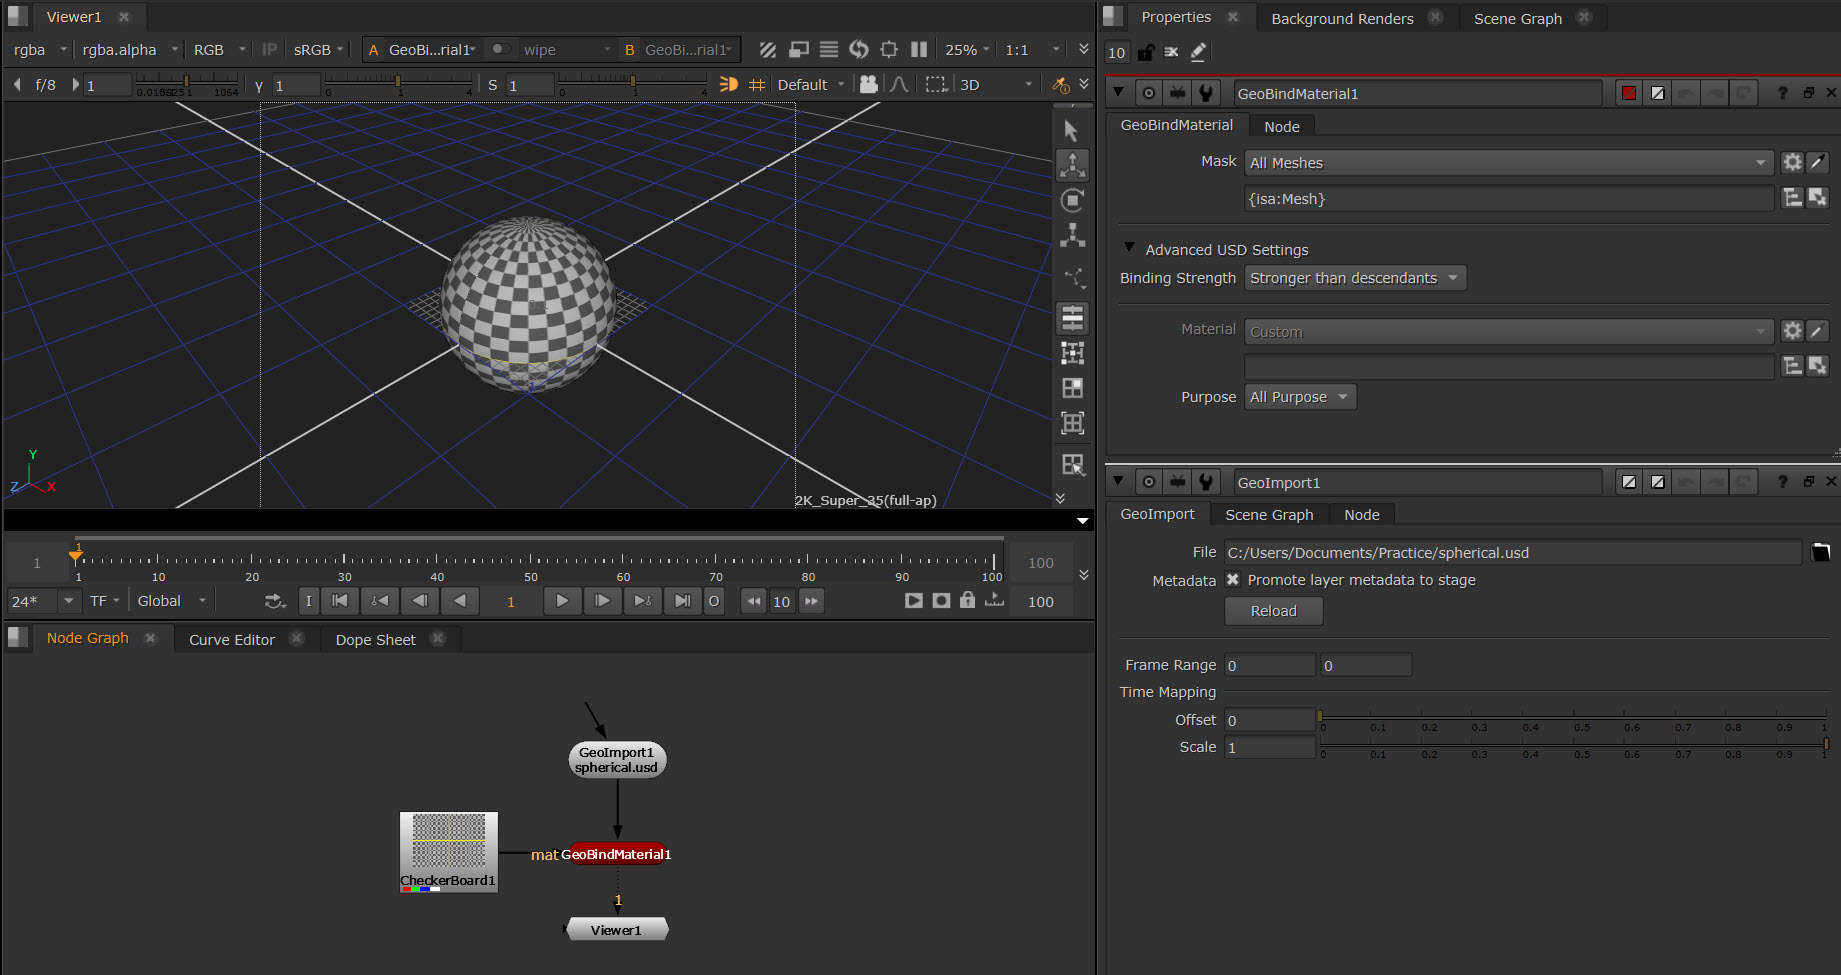
Bind materials across Nuke’s 3D system like you always have, with the added ability to bind any material created in Nuke or imported into your scene. Updates to GeoBindMaterial, the USD equivalent to the classic system’s ApplyMaterial node, enable new material library workflows.
Override existing materials on a USD prim, and see these materials correctly displayed both in the viewer and ScanlineRender.
When binding materials, you can now assign a preexisting material in your 3D stage using the Material mask knob. Also, specify how you want your material bindings to apply to child geometry in the new scene graph hierarchy, with the new Binding Strength knob.
Optimize the performance of your scene graph with the new Purpose control. Define binding purpose to bind higher fidelity materials and shaders for rendering, and lower fidelity versions in the 3D viewport.
Learn more about Using GeoBindMaterial to Assign Materials.
Lighting
Updated light nodes
Updates to Nuke light nodes, DirectLight, SpotLight, PointLight, and EnvironmentLight.
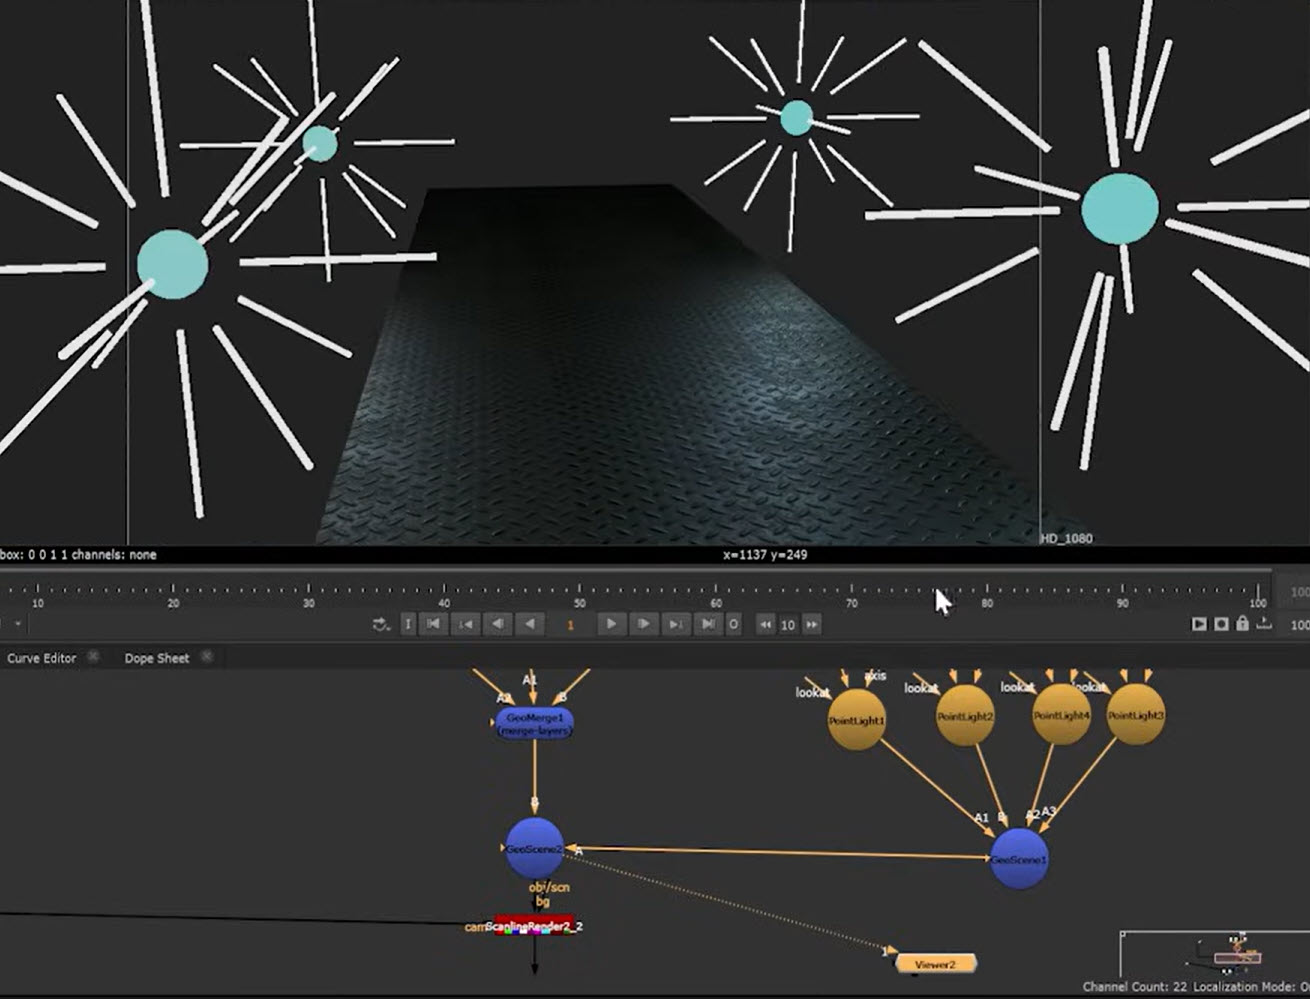
You no longer need to bake data into your 3D light nodes. Attribute data can now be pulled live from the USD file, so that it can be passed through the node, or edited directly.
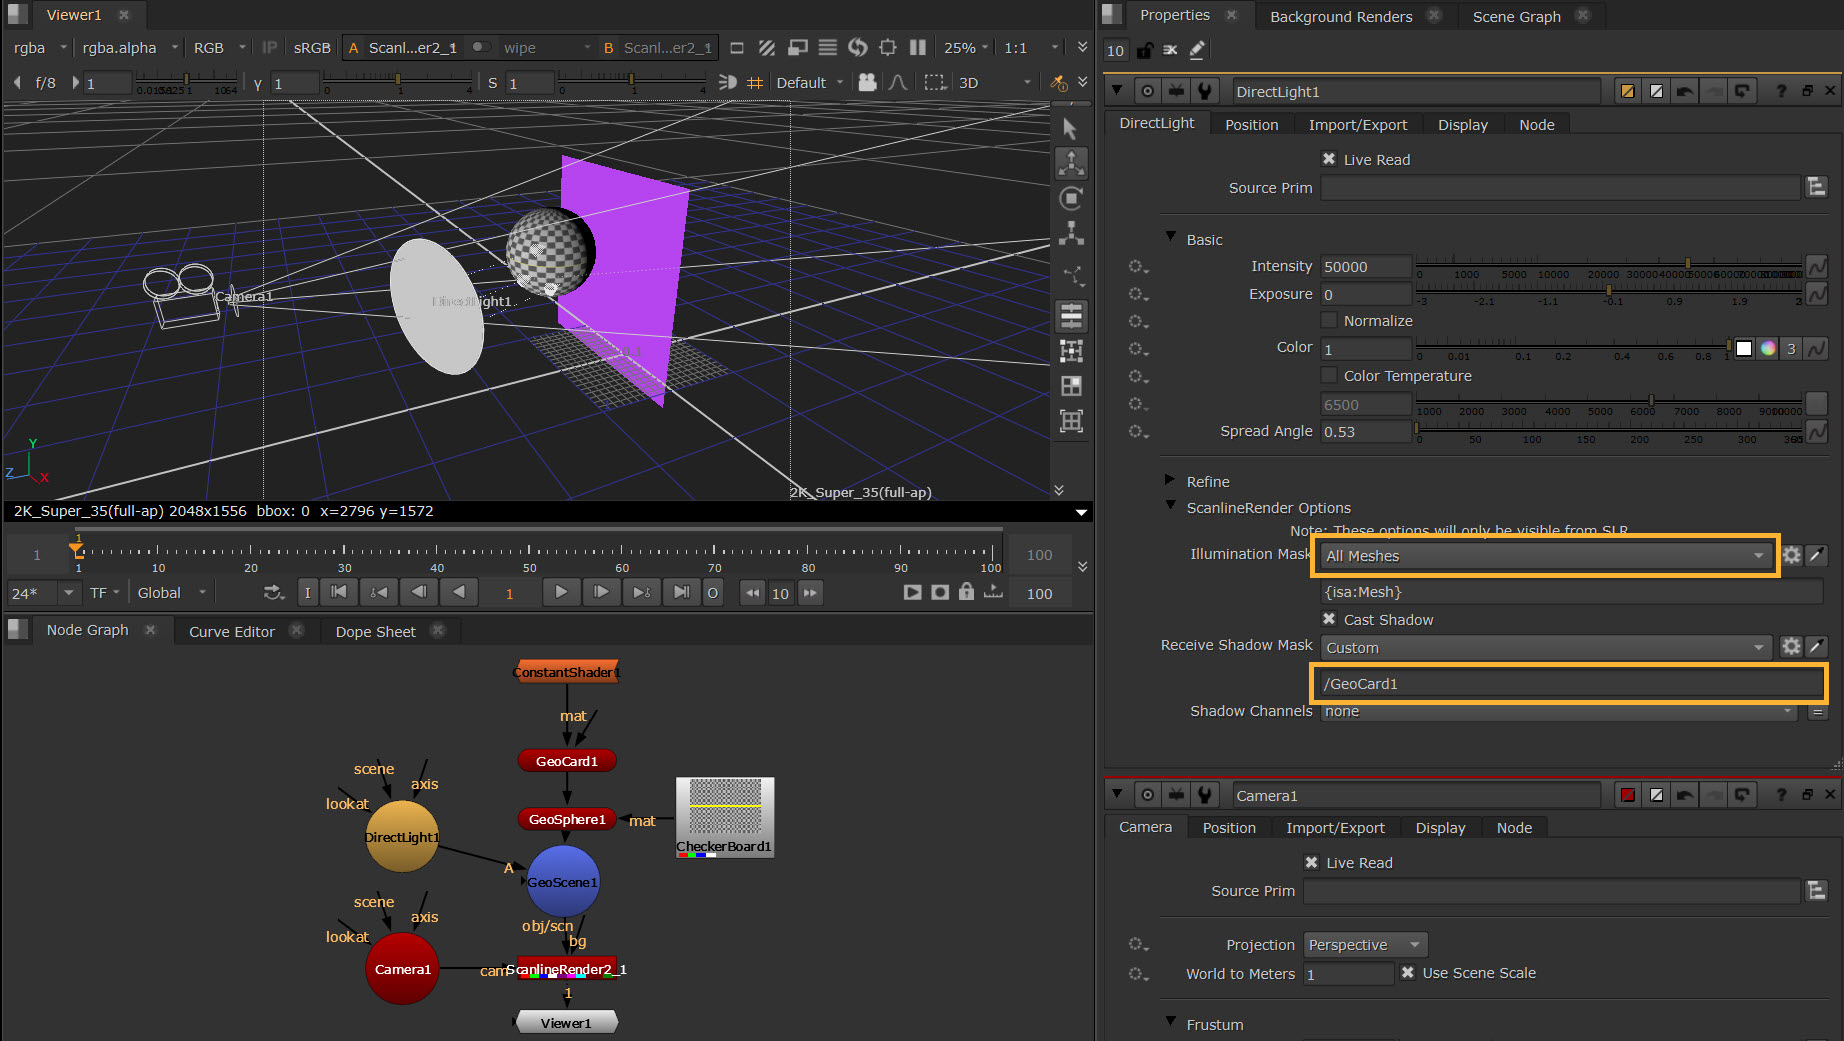
Take control of the shadows in your 3D scene. Specify which objects cast shadows from, or are illuminated by, a certain light. Toggle shadows, and choose which channel to output the shadowing to.
View lights imported via the GeoImport node from the 3D viewer and 3D viewer dropdown menu, and combine Light nodes into the 3D system with the GeoScene node.
You can now disconnect Light nodes from your scene, while retaining light data, with the new Snapshot function, which stores a permanent copy of the data in a frame or frame range.
Read about Using Nuke Lights.
Note: The Light nodes also benefit from Nuke 17.0’s updates to the Axis node. See the Axis section for more information.
USD light nodes
You no longer need to duplicate imported nodes and break the link to the original asset, just to edit them. Use GeoEditLight to directly edit an imported light prim.
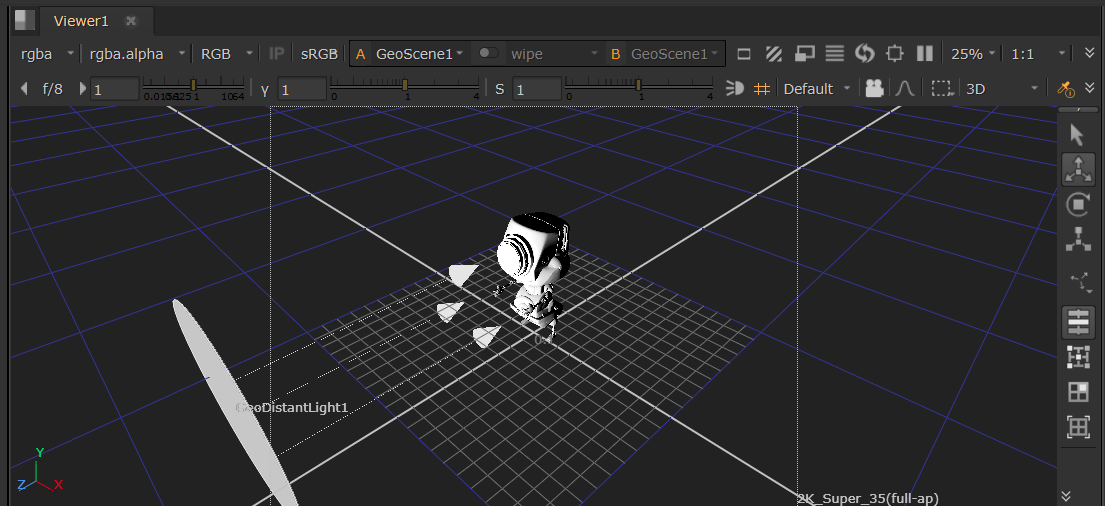
Recreate the sun or a distant light source with GeoDistantLight, the USD equivalent to the classic system’s DirectLight node.
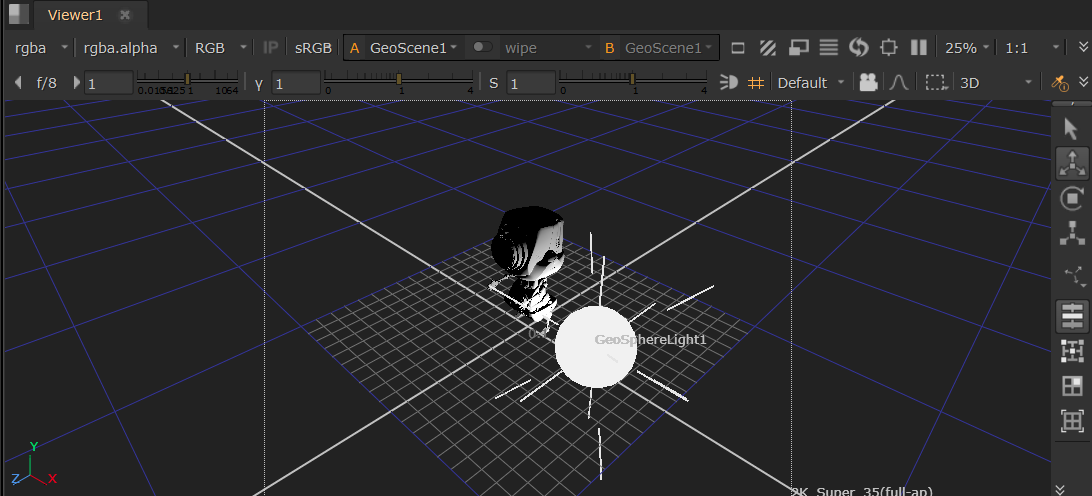
Create and recreate light sources in close proximity to objects, with GeoDiskLight and GeoSphereLight, the USD equivalents to the classic system’s SpotLight and PointLight nodes.
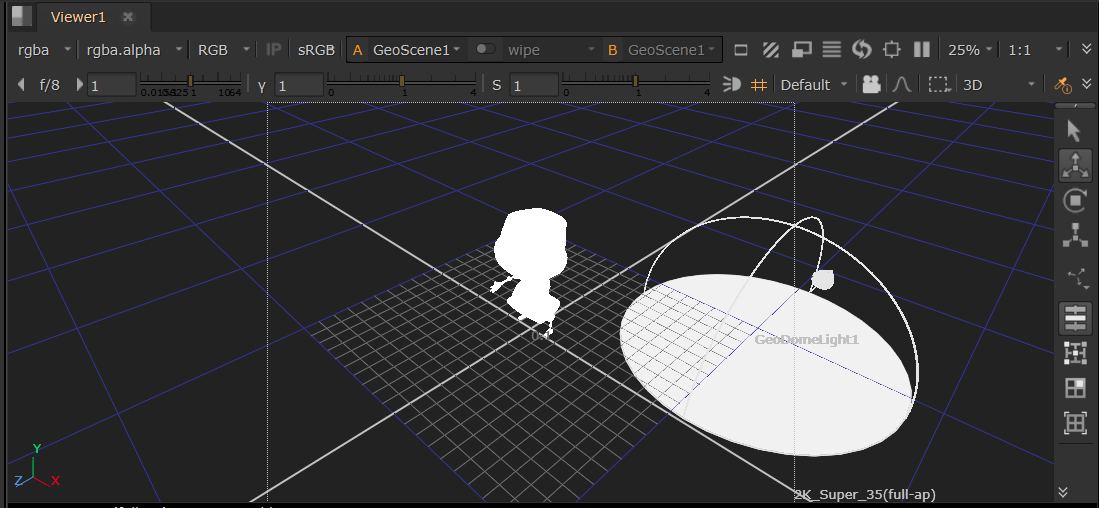
Light an entire scene evenly from all directions and contribute to reflections, with GeoDomeLight, the USD equivalent to the classic system’s EnvironmentLight node.
Read about Using USD Lights.
Lighting controls
We’ve updated the terminology in Nuke’s new 3D system to more closely align with other tools and on-set lighting workflows. This brings you closer to real-world production processes to help you make more natural lighting choices.
Control the light Intensity and Exposure value. Use new checkboxes to enable Color Temperature and keep the power of the light constant when the size is altered.
Change the diffuse and specular response of materials to certain lights with the Diffuse Amount and Specular Amount knobs.
Use Focus and Focus Tint to change the spread of light and its color tint in the falloff region.
Apply Nuke attributes to USD lights. Control the Cone Angle of your light, and the Cone Softness. Set the Falloff Type to control the amount of light an object gets, specify Blur Size, and flip mapped images with Mirror X and Mirror Y.
Learn more about Lights in the Viewer.
Rendering
Ray tracing
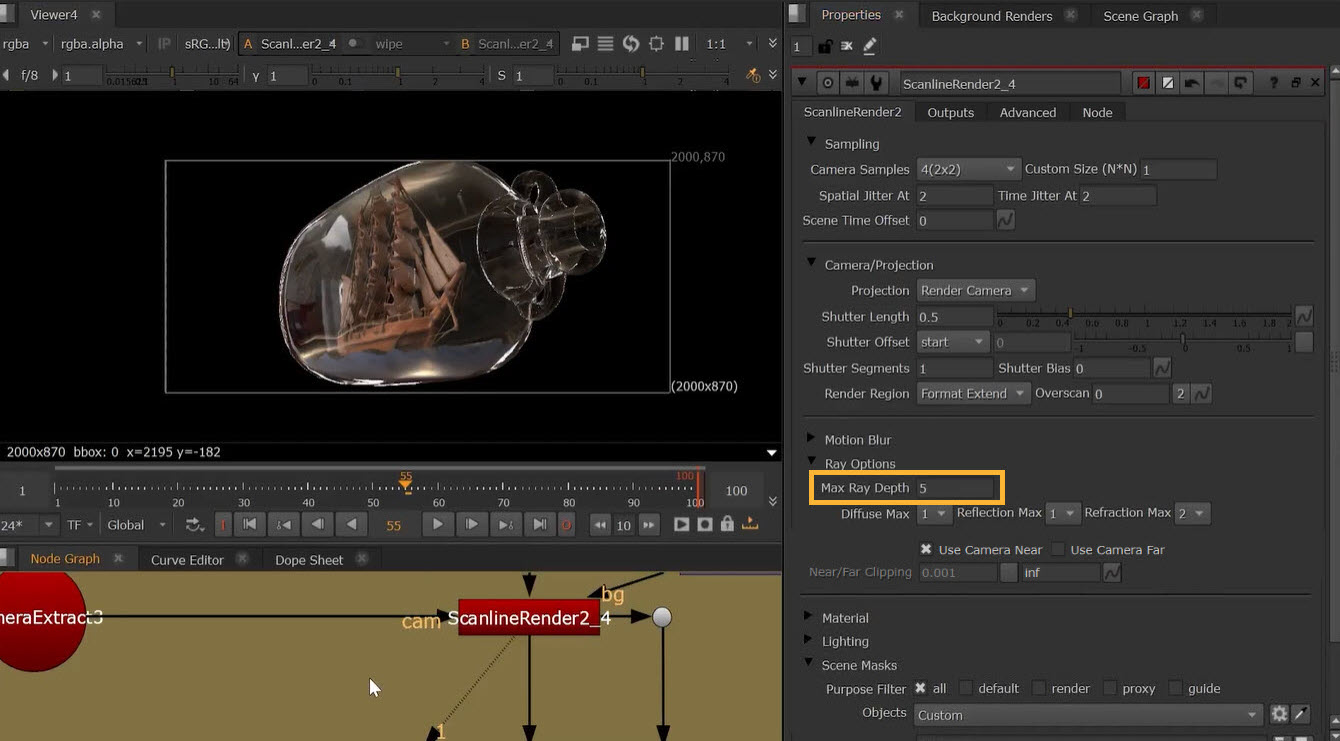
Create more realistic reflections and refractions with ScanlineRender’s new Ray Options.
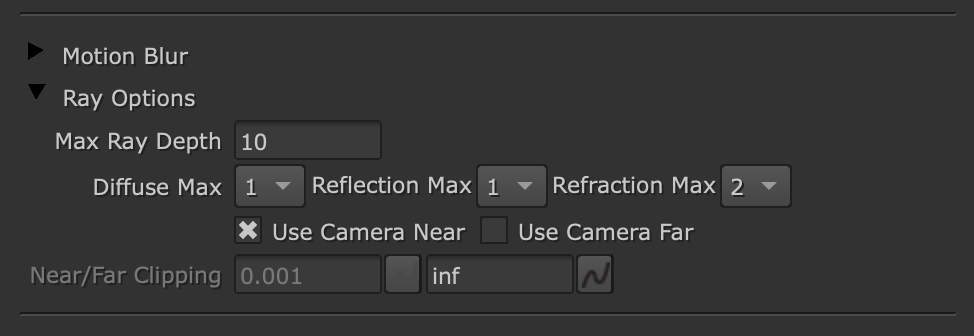
Control the ray depth in your scene with new knobs. Use Max Ray Depth to specify the number of times a ray bounces around a scene, and set the maximum depth of diffuse rays, glossy rays, and refraction rays with Diffuse Max, Reflection Max, and Refraction Max.
Toggle the Use Camera Near and Use Camera Far checkboxes to set custom near and far clipping planes for rendering.
Read about Ray-tracing with ScanlineRender.
Motion blur
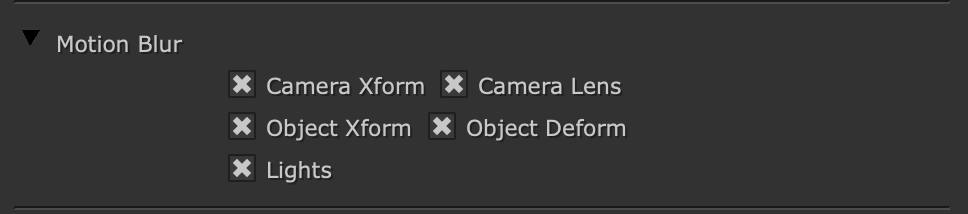
New ScanlineRender knobs provide more motion blur controls and sampling methods, so you can create more accurate motion blur. This reduces banding on low samples, and allows for greater segmentation with rotational motion blur for much more realistic results.
Use Camera Xform to toggle motion blur when the camera is transformed, or Camera Lens when a camera projection control changes. Use Object Xform and Object Deform to toggle motion blur for transforming/deforming objects or Lights for transformed lights.
Take more control over shutter behavior with new Shutter knobs. Specify the open duration with Shutter, and when it should be open or closed relative to the current frame value with Shutter Offset. Use Shutter Segments to determine the number of time segments for motion blur, and Shutter Bias to bias shutters towards closed or open for stylized motion blur.

Read more about Motion Blur with ScanlineRender.
Rendering lights
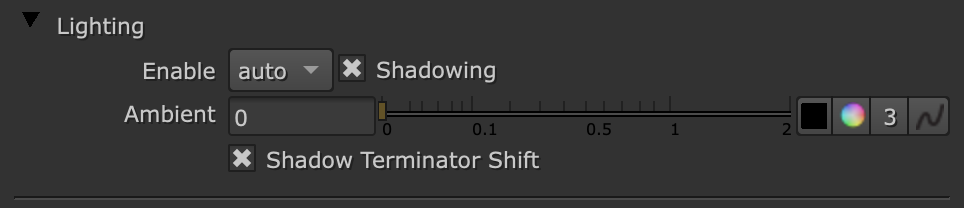
Fully customize how the lights in your 3D scene render. Choose from three new modes — auto, on, and off — in the Enable knob. Change the global ambient color with the Ambient knob, and toggle shadowing cast from direct lighting with Shadowing.
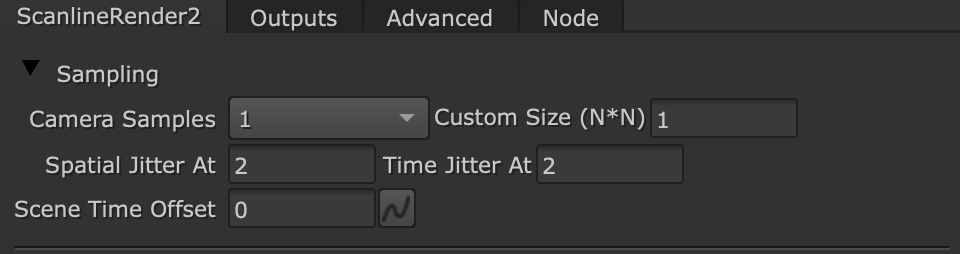
Sampling
Control motion blur and anti-aliasing more efficiently with ScanlineRender’s new Sampling knobs. Control the quality by setting the number of samples rendered per pixel with Camera Samples. Use Spatial Jitter At to control spatial jitter for anti-aliasing, and Time Jitter At to do the same for motion blur. Shift the frame without affecting the camera or objects with Scene Time Offset.
Enhanced AOV output control
Fine tune lighting, color, and more without rerendering your entire scene. Customize Z depth with the 1/Z knob. Select motion vector output type using the Motion Vectors knob: Off, Distance, Distance Normalized, Velocity, or Velocity Normalized.

Surface AOVs also provide more granular control over your outputs. Now you can configure the following attributes for each render pass: Enable, AOV Source, Merge Mode, Unpremult, and Output Layer.
Learn more about Outputting AOVs with ScanlineRender.
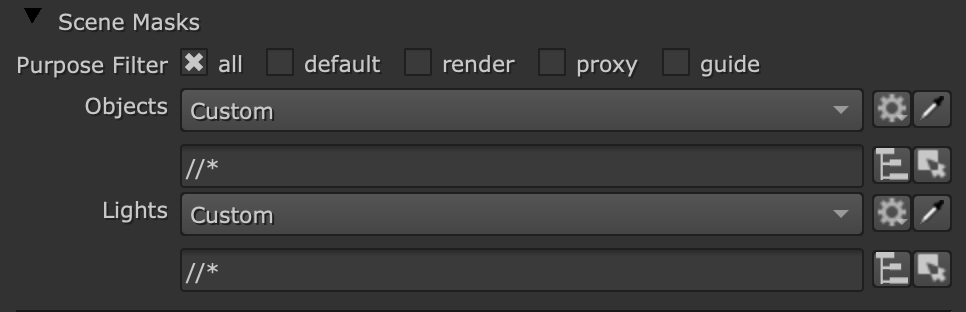
Masking
Control what’s rendered from your stage with new masking options. Set masks via the Objects and Lights knobs to specify which objects and lights are rendered. You can also use the Purpose Filter knob to render based on a prim’s purpose.
Learn more about Rendering in the New 3D System.
Masks in the Node Graph
New GeoMask and GeoClearMask nodes enable you to pass masks down your Node Graph, and you can now inject 3D masks down a pipe. Read more about Using Masks Downstream.
You can now work with the 2D node inject workflow you’re used to in 3D. Mask knobs now default to Default - Injected/All Roots or Default - Injected/All Meshes depending on the node. If a new node’s mask is set to the default option, it will inherit the injected mask from the node above it, so you don’t have to copy and paste masks into each node.
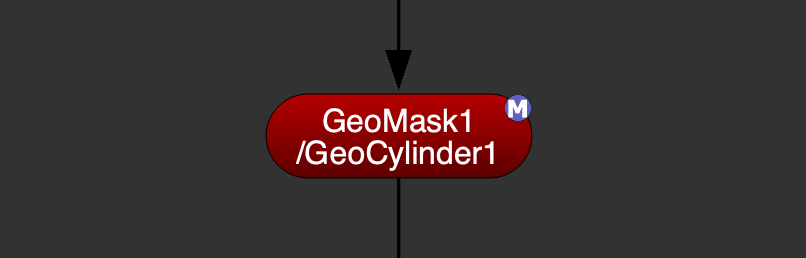
Plus, see which masks are active from the Node Graph with clear indicators on nodes.
UI improvements
Understand your 3D Node Graph at a glance, even when zoomed out. Reading 3D nodes is now more intuitive, with updated node names and colors, mask icons and paths displayed on nodes, and scene graph coloring and filtering improvements.
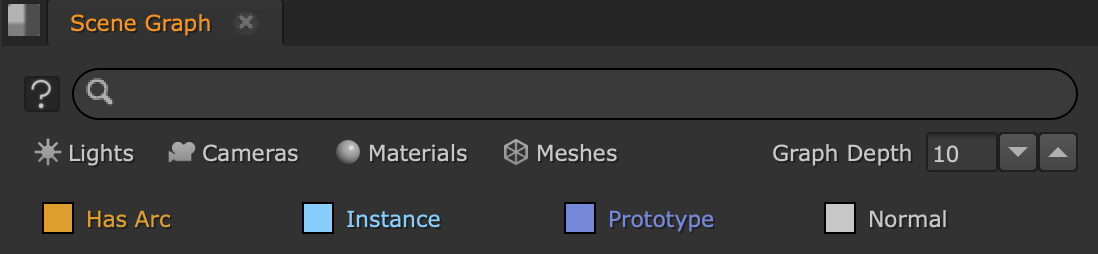
Use the new color coding options in the scene graph for more customization over how you manage your workspace.
Quickly see when data is being read from elsewhere in your script or changed directly on the node itself with the Live Read indicator for Camera, Axis, and Light node knob data.
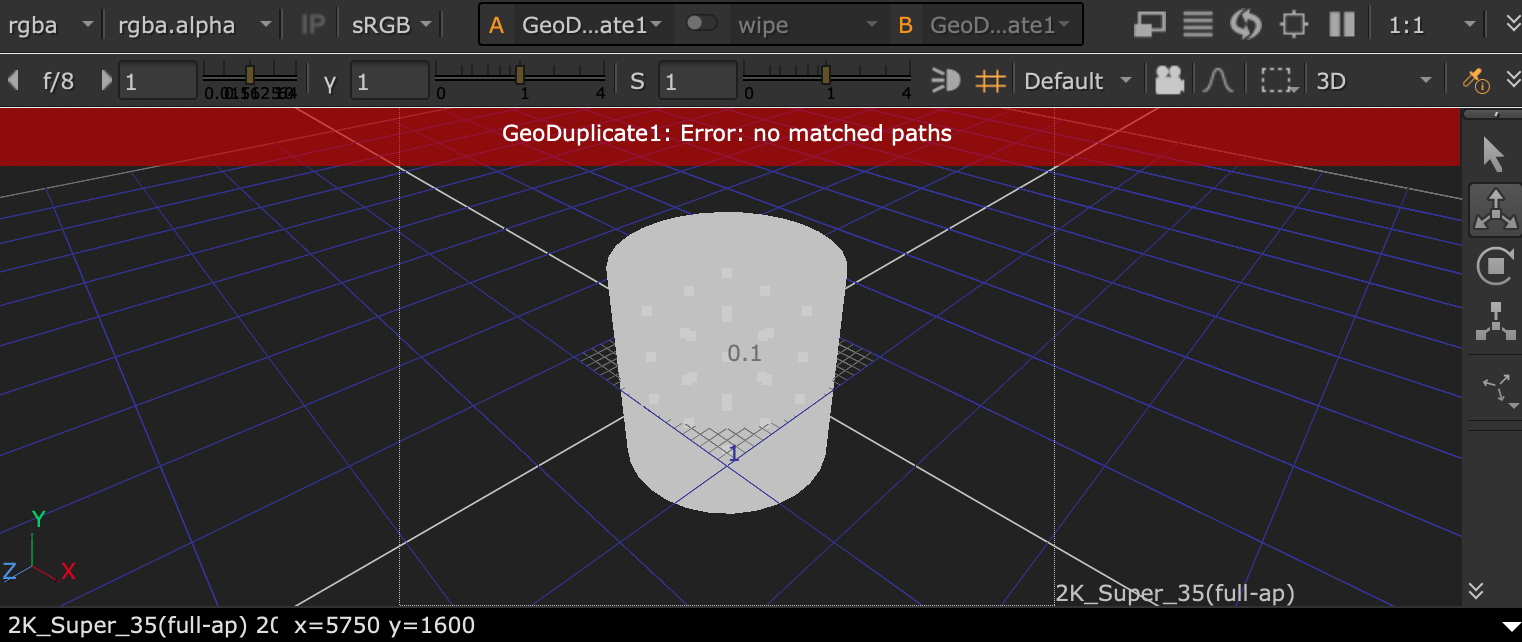
It’s now easier to see a node’s warnings/errors in its Properties, in the 3D viewer, and in the Node Graph. Read more about Debugging Your Scene.
Advanced workflow customization
Python editing
Directly edit and access all USD data within Nuke with GeoPython. You can now edit the Python code to create USD prims and schemas, edit parameters, or delete data directly in your 3D scene.
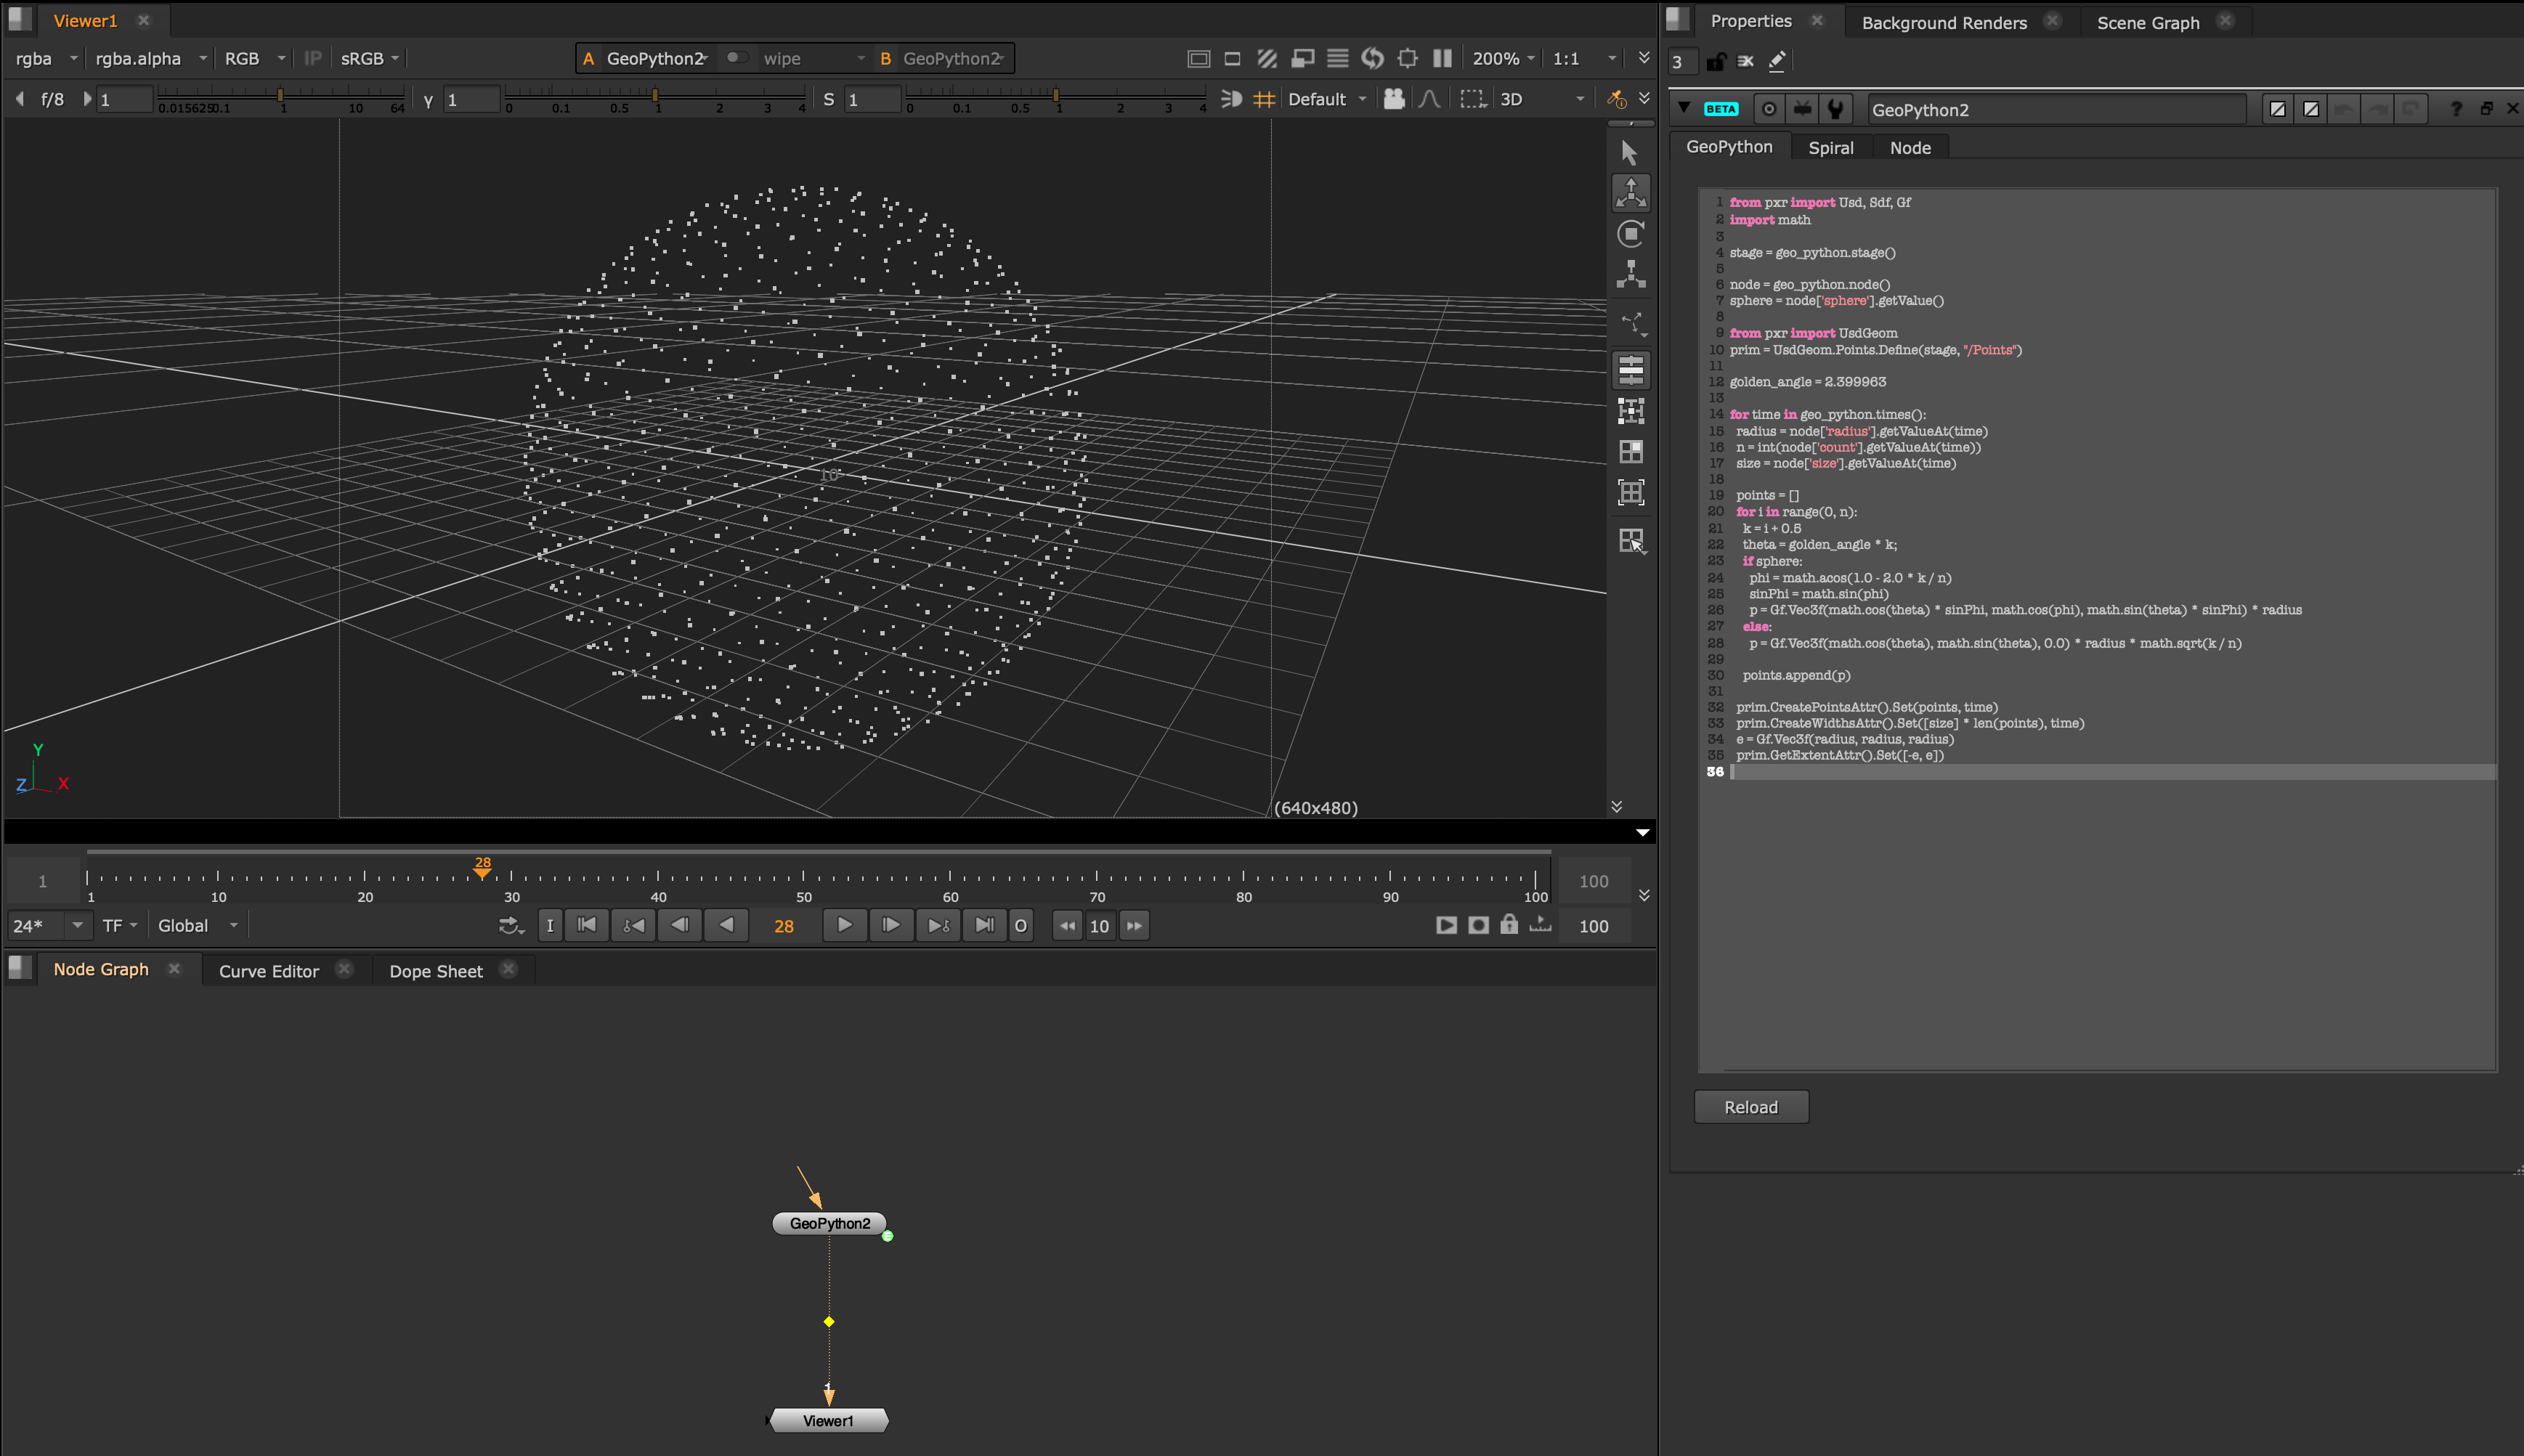
Read more about Editing with GeoPython Node.
Graph Scope Variables in 3D
Set up Variables in your 3D scene to swap out geometry, textures, cameras, and other elements. There are lots of potential uses for GSVs. For example, you can swap a 3D scene between day and night, or switch geometry complexity between performance for navigating the viewer, or high resolution for rendering.
Read about using Using Graph Scope Variables in the New 3D System.
USD version 25.08
Access USD features and bug fixes. Nuke 17.0 supports USD version 25.08. Read more about Pixar’s updates to USD.
Artistic Annotations
Drawing tools
Choose from new brush tools, Clone, Dodge, and Burn, or the redesigned brushes, for a more natural drawing experience. All of the brushes now include options for size, opacity, and hardness, as well as pressure customization.
Use either the color picker or eyedrop tool to select a color directly from your plate, with the revamped Paint brush. You now also have the option to select a blend mode.
Use the flexible Text tool to add notes directly to the viewer. Customize the color, font, size, alignment, and background color from the Text Toolbar.
Communicating your thoughts during live review is now much easier, with the new Vanishing brush. Use this brush on the viewer, and the paint will vanish after a short amount of time.
Access all of these controls from the redesigned Annotations Toolbar.
Read about Painting with the Annotations Toolbar.
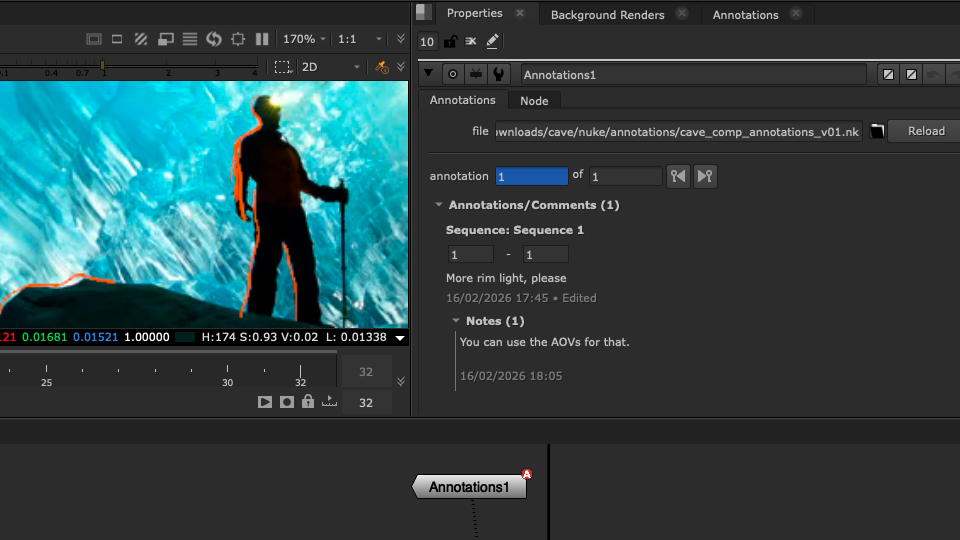
Annotations Panel
The new Annotations Panel provides a centralized hub for discussion, so you can easily keep track of all feedback given and received.
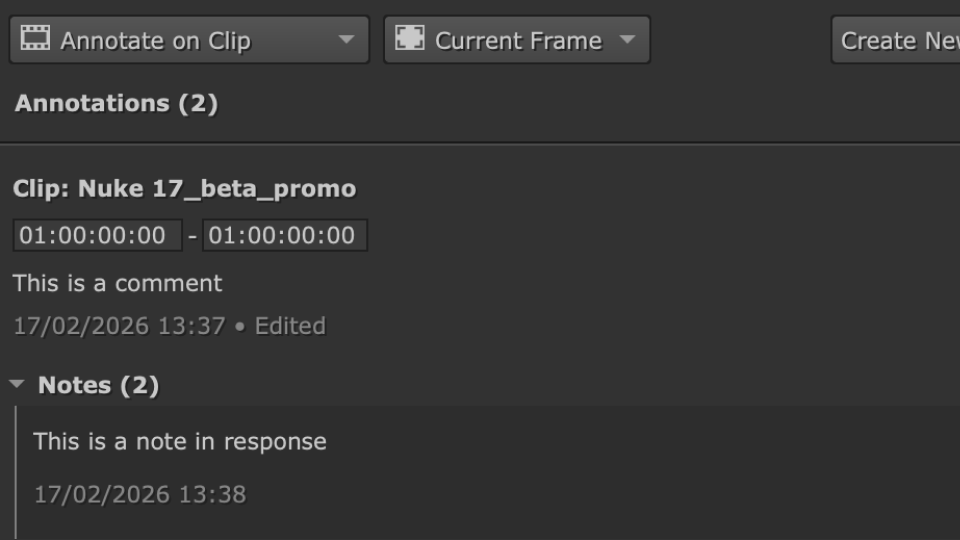
Use the Annotations Panel to add comments, and follow up by replying with notes, which are kept within the same thread and show details such as frame range, time stamps, plus edit and delete buttons.
Create annotations on a full sequence or single shot, and specify the frame range. Plus add full context with a description, notes, and drawings in the viewer.
Use the filter to quickly view what you need, and easily navigate between your annotations, by selecting one within the panel to jump straight to the corresponding frame.
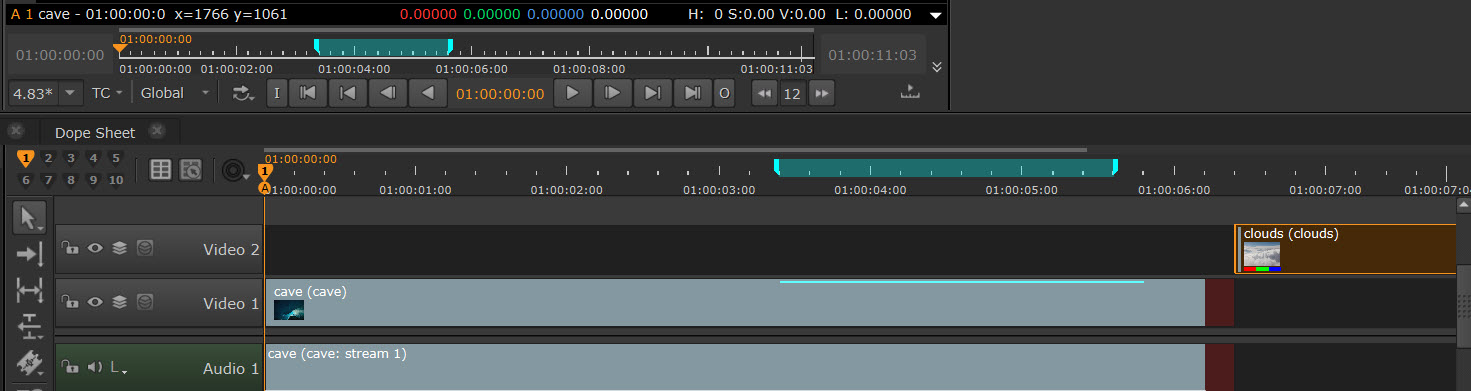
Annotations indicators
It’s now much quicker and easier to see where there are active annotations, and which frame or frame ranges they apply to. You can also modify annotation frame ranges directly from the UI.
Annotations export
You can now export annotations, including comments and notes, to the Nuke script or burn them onto the sequence, giving you more control. You can also export them as .png or .jpeg images in the Custom tab.
Annotation support via the Python API has been expanded, including the ability to create and manage annotations, read, edit and create comments and notes, set and apply brush settings, and much more.
Read more about Annotations.
Machine learning
BigCat
Large-scale machine learning training
Train with much larger data sets with BigCat, the new extension to CopyCat. You can now choose between CopyCat for training a model for a single shot, or a set of very similar shots, or BigCat, for generalizing edits across dozens, or even hundreds of images.
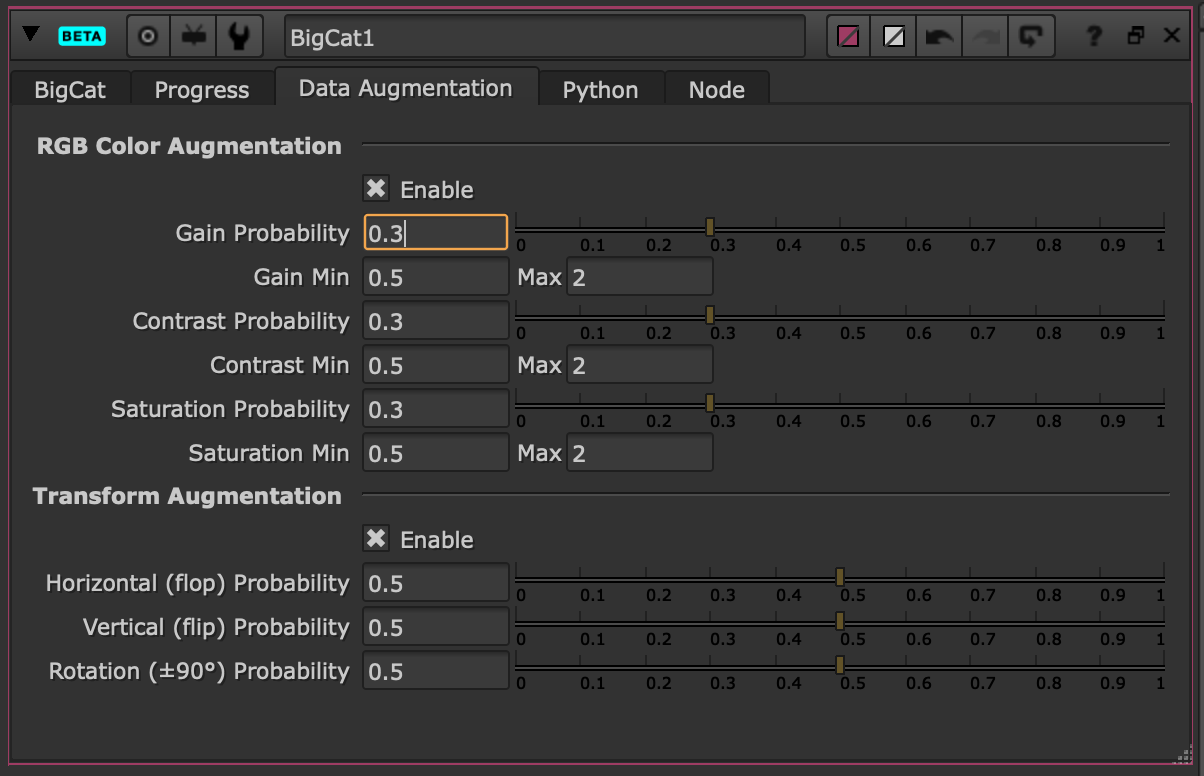
Automatic data augmentation
Create extra variation in your dataset from the Data Augmentation tab within the BigCat node. This extra variation supports different lighting conditions and movements within unseen frames and/or shots.
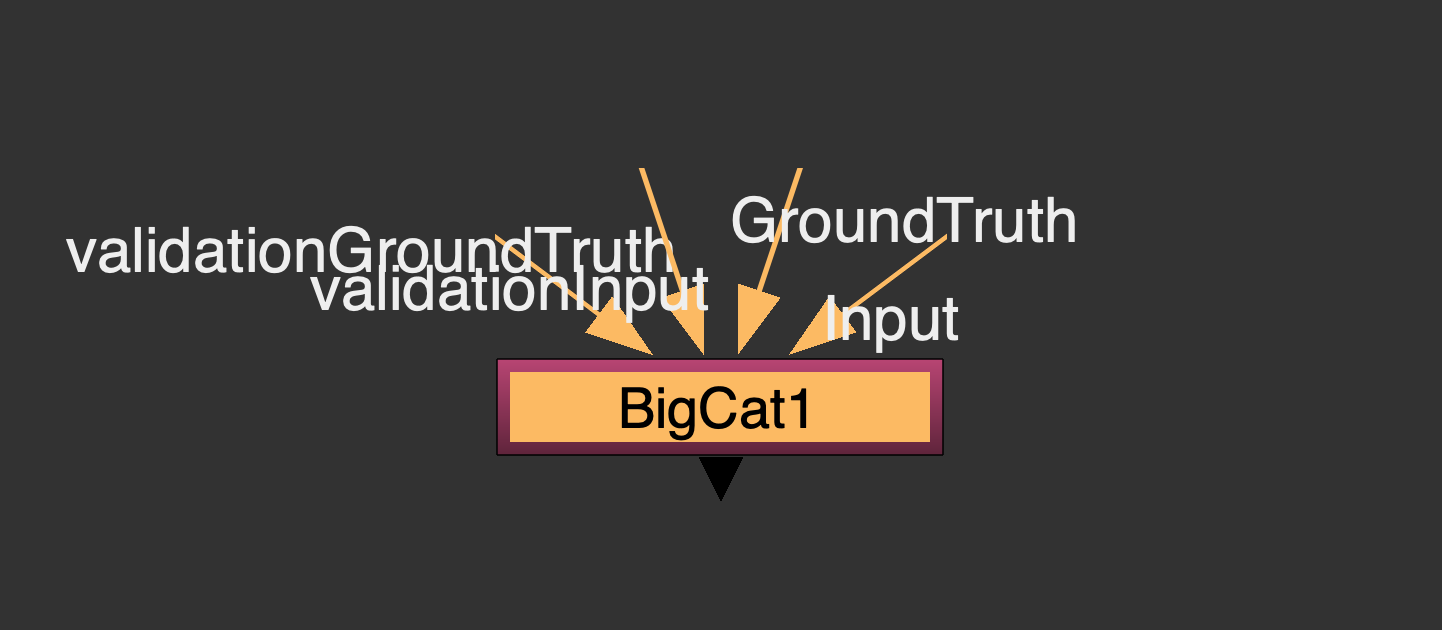
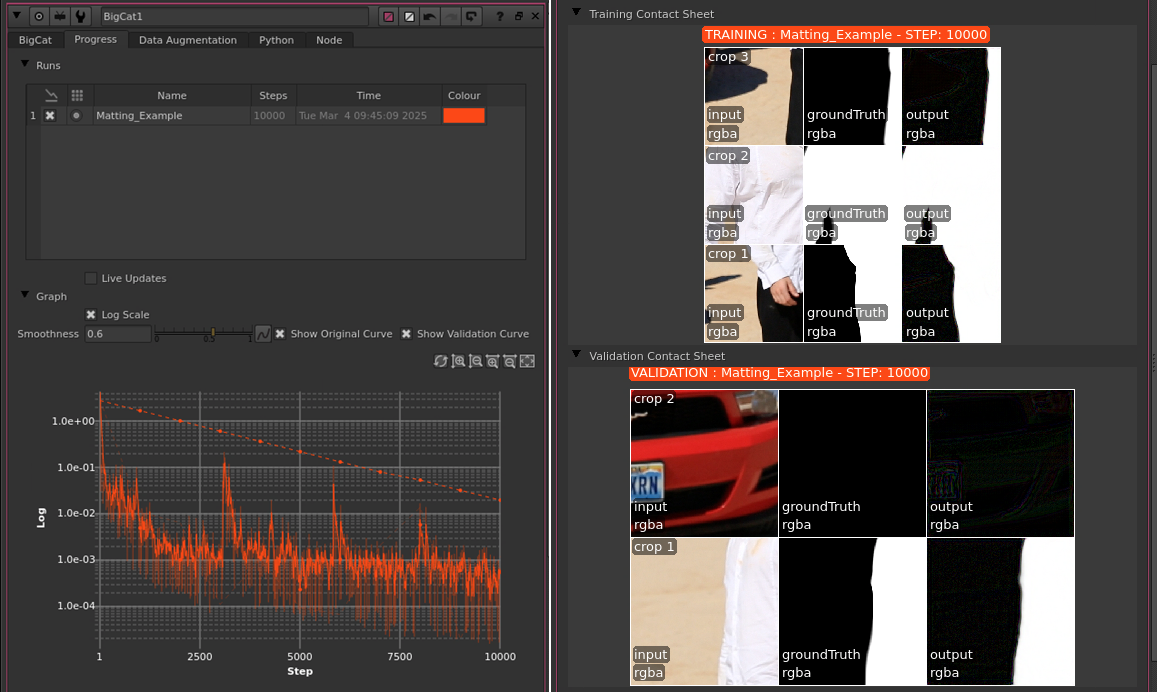
Data validation
Measure how well your model is performing on unseen data by feeding in a validation dataset using new input nodes. View validation loss on the Training Graph to monitor training performance, and monitor inference on your validation dataset from the new Validation Contact Sheet in the Progress tab.
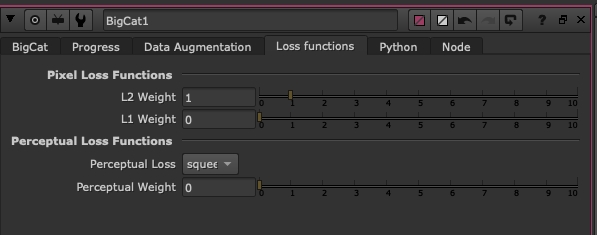
Custom loss functions
Control loss functions used to guide the training process with the addition of perceptual loss (e.g. LPIPS), to push BigCat to match structure and semantics over raw pixels.
Learn more about Using BigCat.
Graph Scope Variables
GSV callbacks
Hook into Variable events for automation and advanced integrations within Variable-enabled and multishot workflows, with new Python Callback and API integration support for Graph Scope Variables. Use these to execute custom Python code when core GSV operations occur via the UI or the Python API.
Learn about Using Python with Graph Scope Variables.
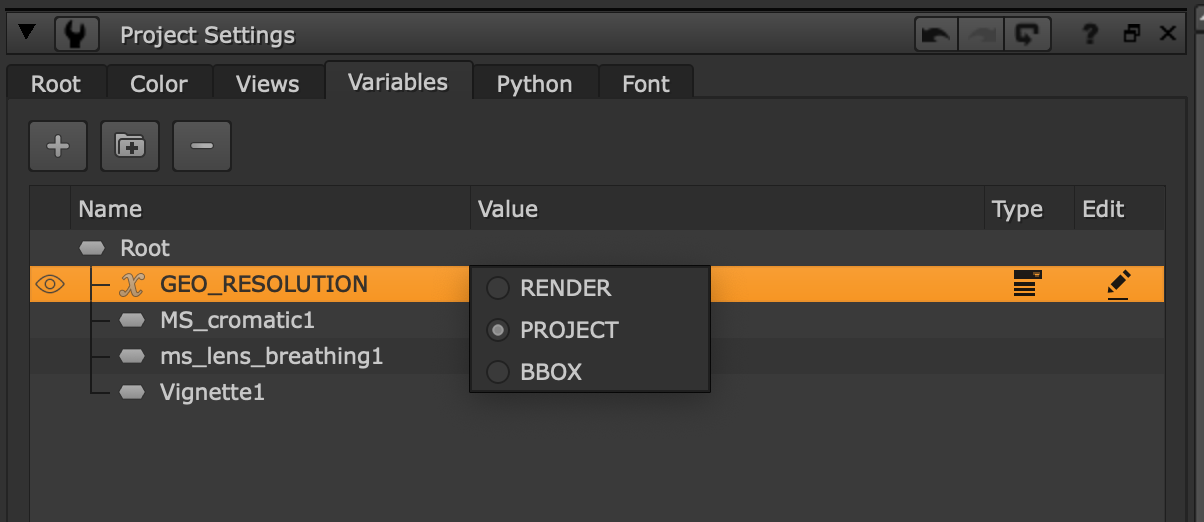
Root node knob expressions
Create GSVs for values that are dynamically updated by setting knob expressions in the Project Settings. GSV expressions are now supported in three specific root knobs: first_frame, last_frame, and fps. This means that even settings like a script's frame range can now be tailored to the artist's current setup.
Read about using Using Variables with the Root Node.
Enhanced GSVs
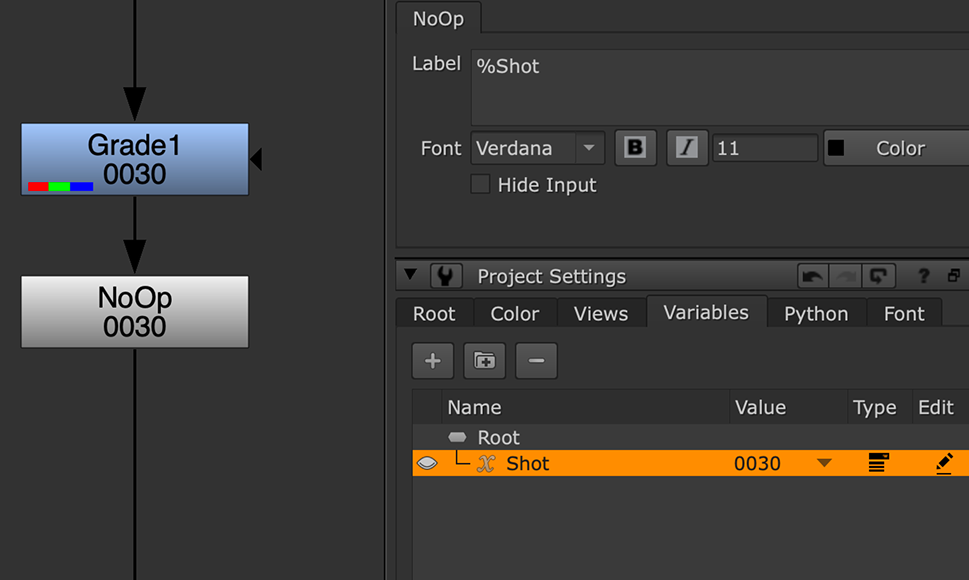
You now have the option to make GSVs visible in node labels, making it much easier to read Variable-driven scripts from the Node Graph at a glance.
Performance improvements make loader times much faster, and interactions more responsive, when working on scripts containing a large amount of Variables.
Variables in the 3D system
Set up Variables in your 3D scene to swap out geometry, textures, cameras, and other elements. There are lots of potential uses for GSVs. For example, you can swap a 3D scene between day and night, or switch geometry complexity between performance for navigating the viewer, or high resolution for rendering.
Read about using Using Graph Scope Variables in the New 3D System.
Core Nuke
File & format support
HDR MOVs and metadata
The option to set the YCbCr Matrix to Rec 2020 has been added to the MOV reader and writer. You can now set the correct HDR export values for your color pipeline, with support for HDR metadata ingest and export. This preserves the YCbCr Matrix, Color Primaries and Transfer Functions values for use in other areas of your color pipeline.
Read about Working with HDR Images.
Native support for ACES 2.0
Take advantage of the next version of ACES and OCIO color management, optimized for HDR and SDR content and designed to meet the needs of modern color pipelines. The ACES 2.0 configs are now shipped natively in Nuke.
NotchLC support
Prepare footage for use in virtual production and other types of optimized high resolution playback from Nuke. The NotchLC MOV codec is now supported on Windows and Linux for Ingest and Export.
Speed & resolution
Faster upscaling processing
Experience significantly faster processing times when upscaling, with the updated TVIScale node, which now performs up to 98x faster on the GPU and 26x faster on the CPU.
Faster deep composite rendering
Render up to 1.88x faster to disk and in the Nuke viewer, with performance improvements to the Deep system.
High resolution OFX Plugins
Use OFX Plugins in Nuke without any artificial limits on the resolution. Plus use Nuke’s native Furnace plugins without resolution limits, at the full scale your hardware and plugins allow.
Pipeline & platform
USD version 25.08
Access USD features and bug fixes with Nuke 17.0’s support for USD version 25.08. Read more about Pixar’s updates to USD.
VFX Reference Platform
Ensure your pipeline runs smoothly with Nuke 17.0's full support for VFX Reference Platform 2025. See the full list of libraries for Nuke 17.0 at Third-Party Libraries and Fonts. If you need more time to update your pipeline, you can upgrade to Nuke 16.1, which supports VFX Reference Platform 2024.
OpenAssetIO library updates
Nuke 17.0 includes updated versions of the OpenAssetIO and OpenAssetIO-MediaCreation libraries, enhancing stability and performance.
Updated Sony SDK & SMDK support
Nuke 17.0 supports the latest version of the SONY SDK and SMDK exposing two new recording formats from the Burano camera firmware v2, 3.8K, 16:9, and 4K 4:3.
Monitor Out updates
Nuke 17.0 includes updated support for the AJA Products NTV2 17.5x, BMD DeckLink 14.4, and NDI 6.x SDKs. As well as the addition of 10 bit support.