Controlling Tool Properties With Mouse gestures
Hauling is clicking and dragging in the 3D view (without starting from a specific UI element or handle) to edit a value, most commonly a tool attribute, while a tool is active, or a channel value while Channel Haul is active.
OmniHaul provides a more uniform and consistent interface for performing hauling operations in Modo, while allowing which attributes or channels are hauled to be controlled by the user.
Tool Hauling
With OmniHaul, the left, middle and right mouse buttons can be independently assigned to different attributes, and a single button can edit multiple values at once.
Changing the mouse button assigned to an attribute is done through the Tool Properties. When a tool is active, the very left side of each control’s label shows an icon indicating the mouse button and axis (horizontal or vertical) that is assigned to it. If no attribute is assigned, you can mouse over the left edge of the form to make the control appear.
To change an assignment, click with the left, middle or right mouse button and drag horizontally or vertically. This assigns that button to that axis. By default, if something else is already mapped to that button and axis, it will add this assignment to it, but you can hold down ctrl to replace the existing mappings with the new one.
OmniHaul Value HUD
While hauling in the 3D viewport, a value HUD will appear at the bottom of the 3D view to show the current value of the attributes being dragged. This shows up to three values, sorted alphabetically. After releasing the mouse button, there will be a slight pause and then the HUD will fade out. You can click and drag on any of the values to change them like a mini slider, or you can click and release to type in a new value. You can also press Enter on the (Return on Mac ) to open the edit field, then press Tab to cycle through the fields.
Note: The Value HUD includes settings for procedural tool handles and the meshop.haul tool.
Coarse and Fine Adjustments
You can hold down the shift and ctrl keys while hauling to do fine and coarse adjustments respectively. This also works for Channel Haul and on all the mini sliders on numeric edit fields in the application, as well as in the OmniHaul Value HUD. In all cases you can press the modifier key while the mouse button is already down, but for hauling in the viewport you must wait until you have clicked before pressing the modifier, or you’ll perform a different action instead.
OmniHaul and Tool Defaults
Modo includes a number of OmniHaul assignments for many tools as defaults. You can override these assignments yourself at any time, and they will be remembered in memory until you quit and restart Modo.
If you want to make your new hauling assignments permanent, You can use the Presets popup at the top of each tool’s named divider in the Tool Properties to save new default hauling for each tool (for the next time you start Modo), and you can reload the defaults from the same menu.
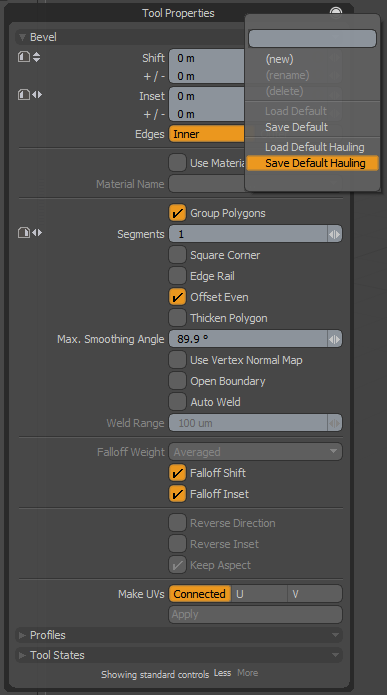
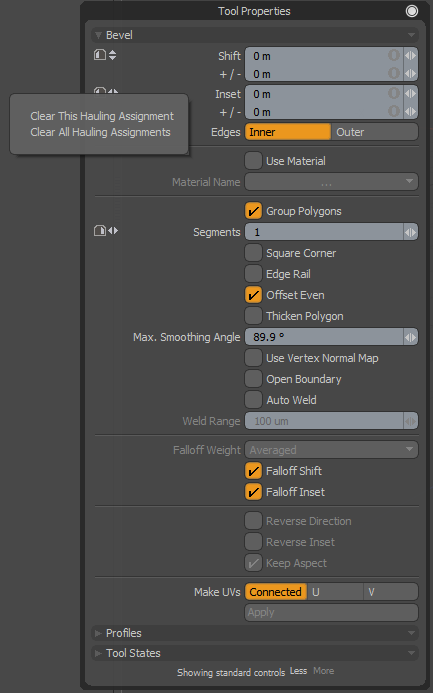
To clear an assignment, click and release on the OmniHaul button without dragging. This opens a menu allowing you to clear just one assignment or all assignments.
The Presets menu now also supports assigning defaults for the tool attributes themselves on a per-tool-component basis.
Channel Hauling
For items, OmniHaul uses the existing Channel Haul tool, which has been updated to support left, middle and right mouse buttons and horizontal and vertical hauling. As such, it continues to use channel selection, but the selection has been extended to include the mouse button and axis for hauling.
The OmniHaul Value HUD is only displayed for tool attribute hauling. For channels, Channel Haul provides similar functionality already. Channel Haul must be active to haul channels.
Selection and Explicit vs Implicit Assignment
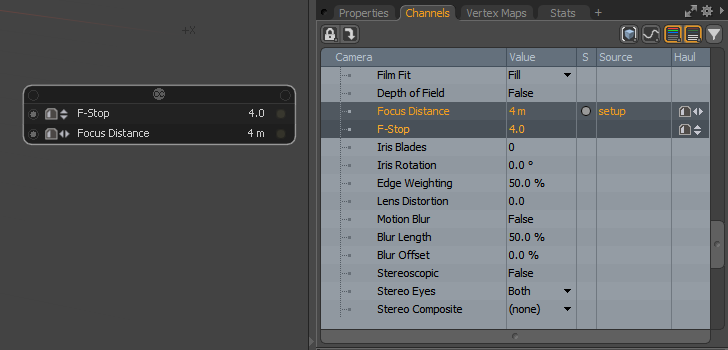
When you select a channel directly, it implicitly maps it to the left mouse button on the horizontal axis so that legacy workflows with Channel Haul continue to work.
You can explicitly set the button and axis by dragging on the OmniHaul button in a direction with the left, middle or right mouse button, which can be found on the far left side of Item Properties) (like in Tool Properties) from the new Haul column in the Channel List, or from the Channel Haul tool itself, which will also select the channel and activate the Channel Haul tool for immediate hauling.
If you explicitly set a hauling button and axis on a channel (by dragging on the OmniHaul button), all of the selected channels will be stored in a tag on that item, which will be saved with the scene. When you select that item again, it will reselect those channels. If you only implicitly changed hauling (for example, by selecting a channel in a form or the Channel List), it will not replace your OmniHaul assignments in the item tag, and selecting a different item and then selecting the original item will load the assignments you explicitly previously set. The goal here is to let you select some channels for editing in Graph Editor without necessarily affecting hauling assignments.
OmniHaul and Item Defaults
The All Tabs preset popup at the top of the Item Properties can be used to save hauling defaults for the selected item type, but only if one item is selected (otherwise, the option is disabled). You can separately save hauling default and channel value defaults. These defaults are used when creating an item of that type.
There are specific rules for when these defaults will actually be applied to a newly-created item. Normally, that is when creating it from an item type preset in the Preset Browser, or when the creation command is the root-level command execution (for example: item.create or layer.new mapped to a key). Creating a new item from a script will not automatically load defaults, as this may result in settings that the script doesn’t expect and effectively break the script. Scripts can request that defaults be loaded via optional arguments on those commands.
Item Form Presets in the Preset Browser
If you create a new Form Preset for an item from the All Tabs popup in the Item Properties form, that form preset also appears in the Add Item Preset Browser. This allows you to quickly add items with different settings to your scene just like you would any other item.
Channel Sets
You can also assign hauling to channels in Channel Sets from the Groups viewport. The new Hauling column on the far right can be used to set hauling. When the channel set is loaded, the hauling is assigned as well.
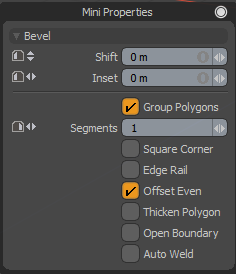
Mini Properties Popover
Press spacebar to open the Mini Properties popover. This is a curated version of both the Tool Properties and Item Properties forms. What is shown is based on what is selected:
• If a tool is active, the tool properties are shown.
• If an item is selected, or if all selected items are of the same type, that item’s properties are shown, but without vertical tabs.
• In all other cases, the popover does not show, and is automatically hidden when pinned.
This replaces the existing spacebar behavior to drop tools and cycle component modes, which can be done with the Q or Esc keys, and with the top row 1, 2 and 3 keys.
Third parties can easily add their own tools and items to the mini popover by setting the proficiencies of their controls in the Item Properties or Tool Properties to basic.