Search is based on keyword.
Ex: "Procedures"
Do not search with natural language
Ex: "How do I write a new procedure?"
Adding Materials to a Shelf
Materials are created from multiple texture files, procedurals or plain colors that can be used to accurately represent how light interacts with real-world materials. This method of shading is called Physically Based Rendering (PBR). You can apply these materials to your assets for a more realistic result as well as establishing a base line look for your asset before adding more bespoke paint and crafting details.
Mari provides a set of predefined materials (presets) in the Mari Materials tab of the Shelf palette but you can also add your own materials to the Menu, Personal, and Project shelves or any custom shelves.
Note: You can create materials manually using the Node Graph (see Working with Materials in the Node Graph) or you can use the Material Ingest Tool
To add your own materials to a shelf, drag one or more .mma files from your file browser into a shelf.
Alternatively, right-click in the shelf, select Load Items then browse to the .mma file(s), and click Open.
This creates material thumbnails in the shelf.
To delete a material from a shelf, select one or more materials and press Delete or right-click and select Delete Item.
Note: You can also drag predefined materials from the Mari Materials tab to your own shelves.
Customizing Material Thumbnails in the Shelf
When you export a material as a .mma file, you have the ability to define the object, environment, and projector that appear in the thumbnail for the material. The options to do this are found in the Preferences dialog, under the Thumbnail tab.
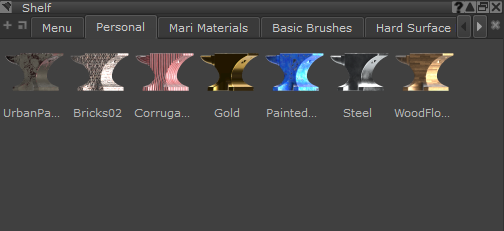
Custom material thumbnails seen in the Shelf.
Note: This only affects materials exported after you've changed the Thumbnail preferences.
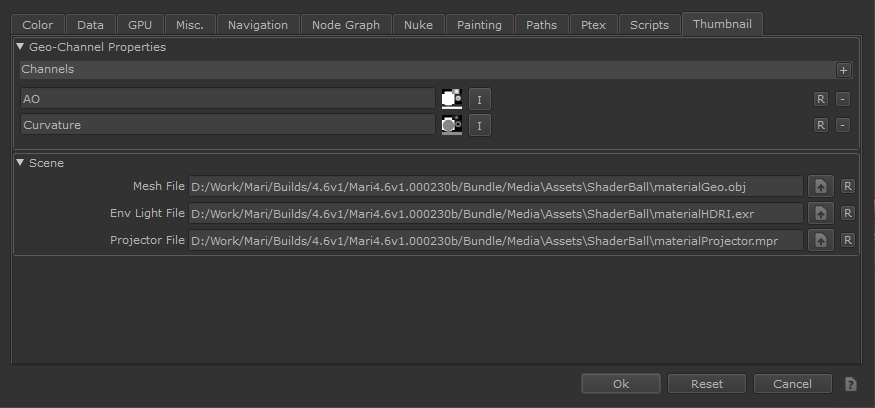
The Thumbnail tab in the Preferences.
To Change the Mesh, Environment, and Projector Which Appear in the Exported Material Thumbnail:
| 1. | Select a mesh file using |
| 2. | Select an environment light file using |
| 3. | Select a projector file using |
For more information on Projectors, see Creating the Projector.
You can also add Geo-Channels to the thumbnail mesh object, which can be useful in instances where your materials make use of Geo-Channels. For more information on Geo-Channels see Adding Geo-Channels to Objects and Geo-Channel Nodes.
To Add or Change Geo-Channels for the Object in your Material Thumbnails:
| 1. | Click  on Channels to add a new Geo-Channel. on Channels to add a new Geo-Channel. |
| 2. | Click in the Geo-Channel name field to give the Geo-Channel a new name. |
| 3. | Click  on the Geo-Channel to add an imageset to the Geo-Channel. on the Geo-Channel to add an imageset to the Geo-Channel. |
When .mma files are exported, and then placed into your Shelf, they appear with the mesh and associated geo-channels, environment, and projector you selected.
Sorry you didn't find this helpful
Why wasn't this helpful? (check all that apply)
Thanks for your feedback.
If you can't find what you're looking for or you have a workflow question, please try Foundry Support.
If you have any thoughts on how we can improve our learning content, please email the Documentation team using the button below.
Thanks for taking time to give us feedback.